How to Build a Course Archive Template
Build an Elementor archive template that replaces the default LifterLMS course catalog page with your own layout, using the Course List widget to display every published course.
Elementor Pro (the Theme Builder is a Pro feature), LifterLMS with at least one published course, and Lifter Elements installed and active. See Theme Builder Locations for how Lifter Elements exposes LifterLMS content to the Theme Builder.
1. Create an Archive template
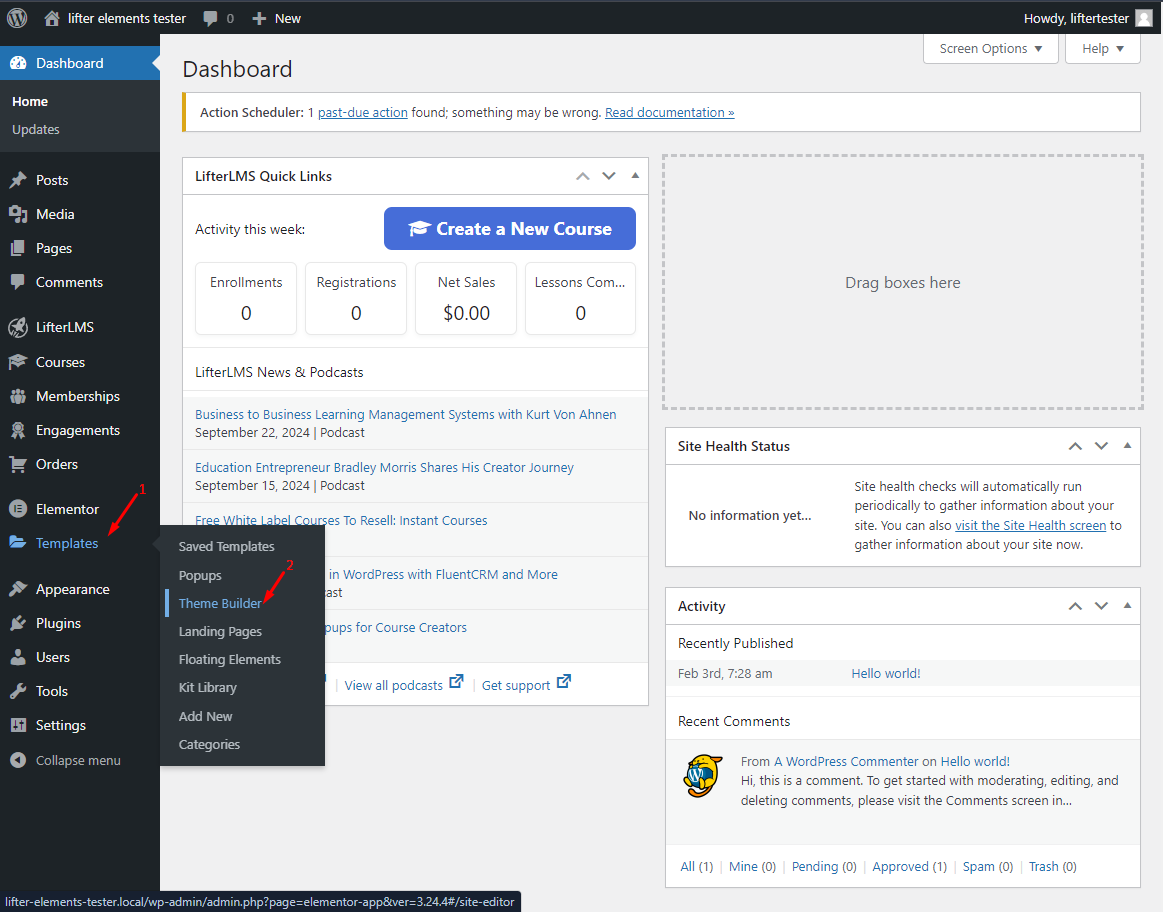
In the WordPress admin, go to Templates > Theme Builder.
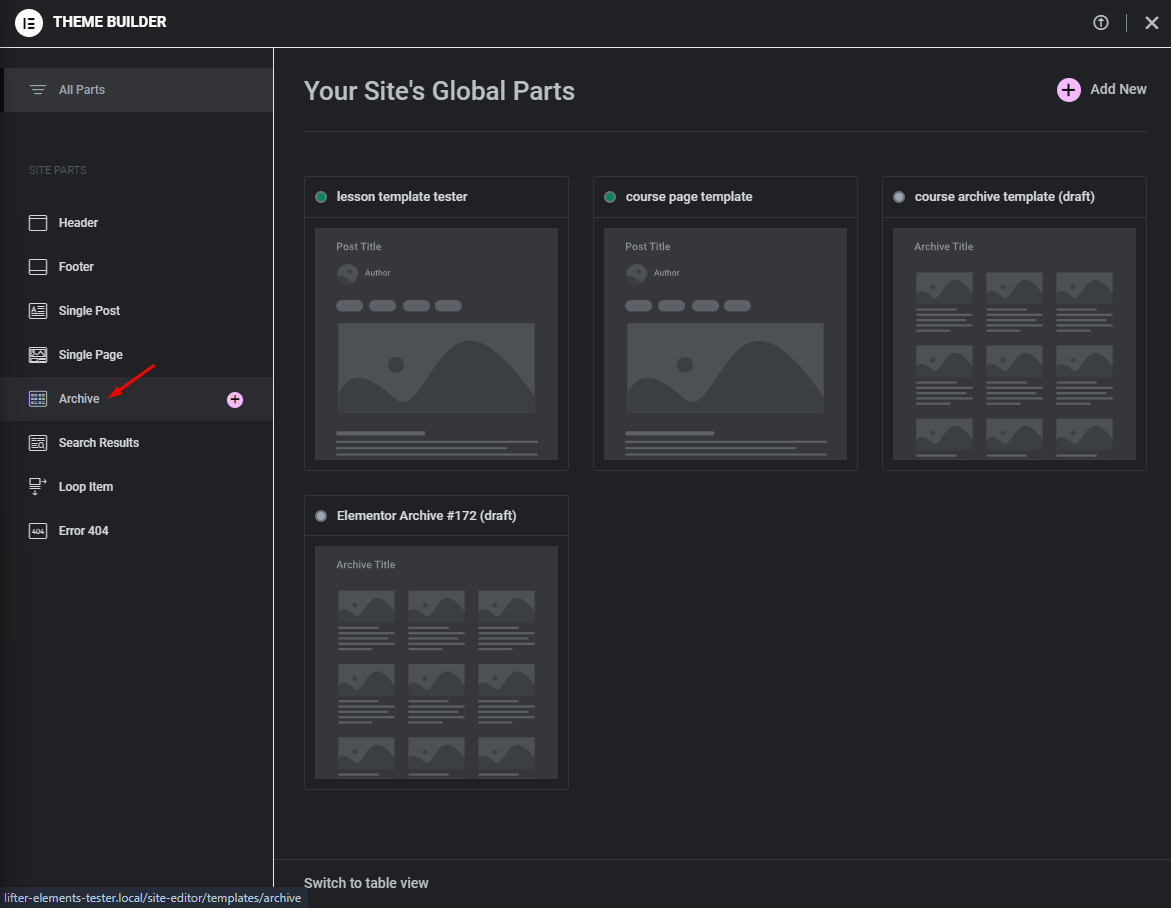
Select the Archive tab in the left-hand list, then click Add New.
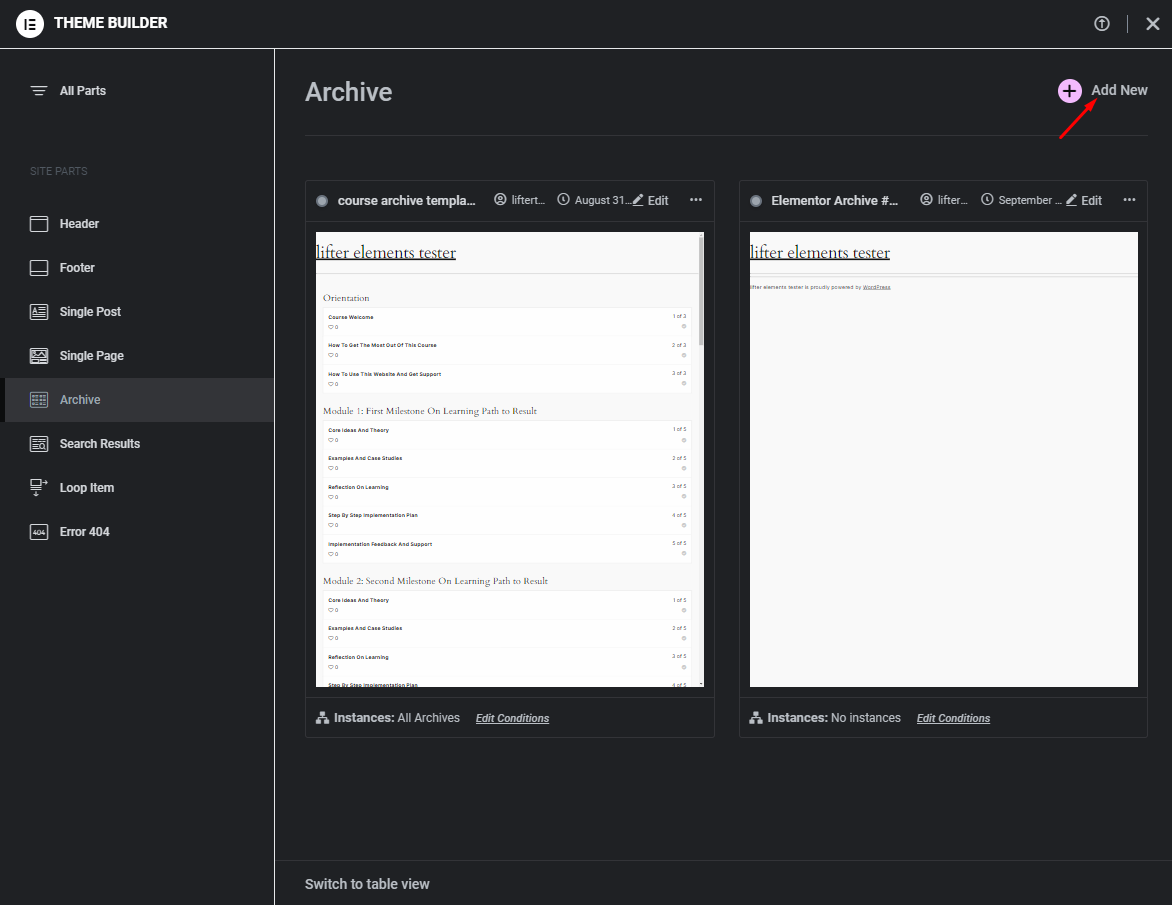
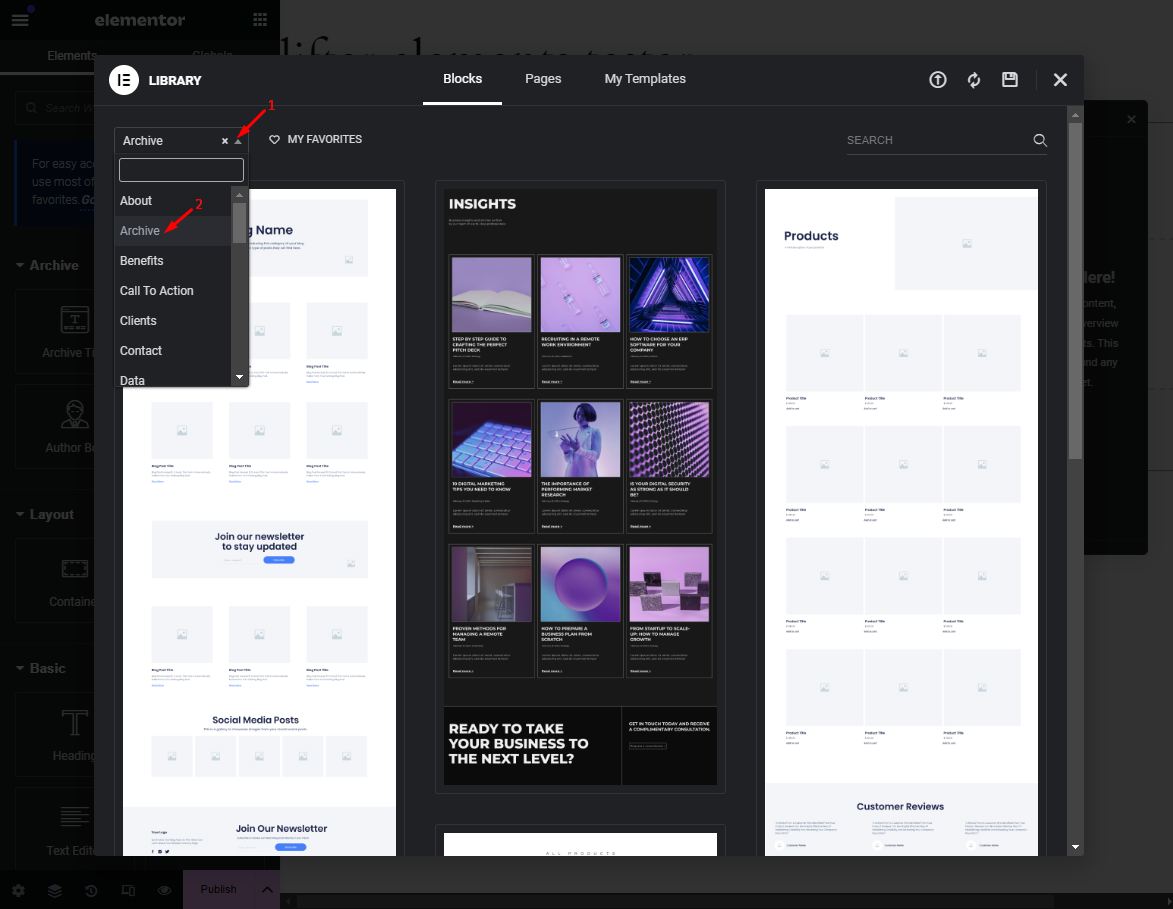
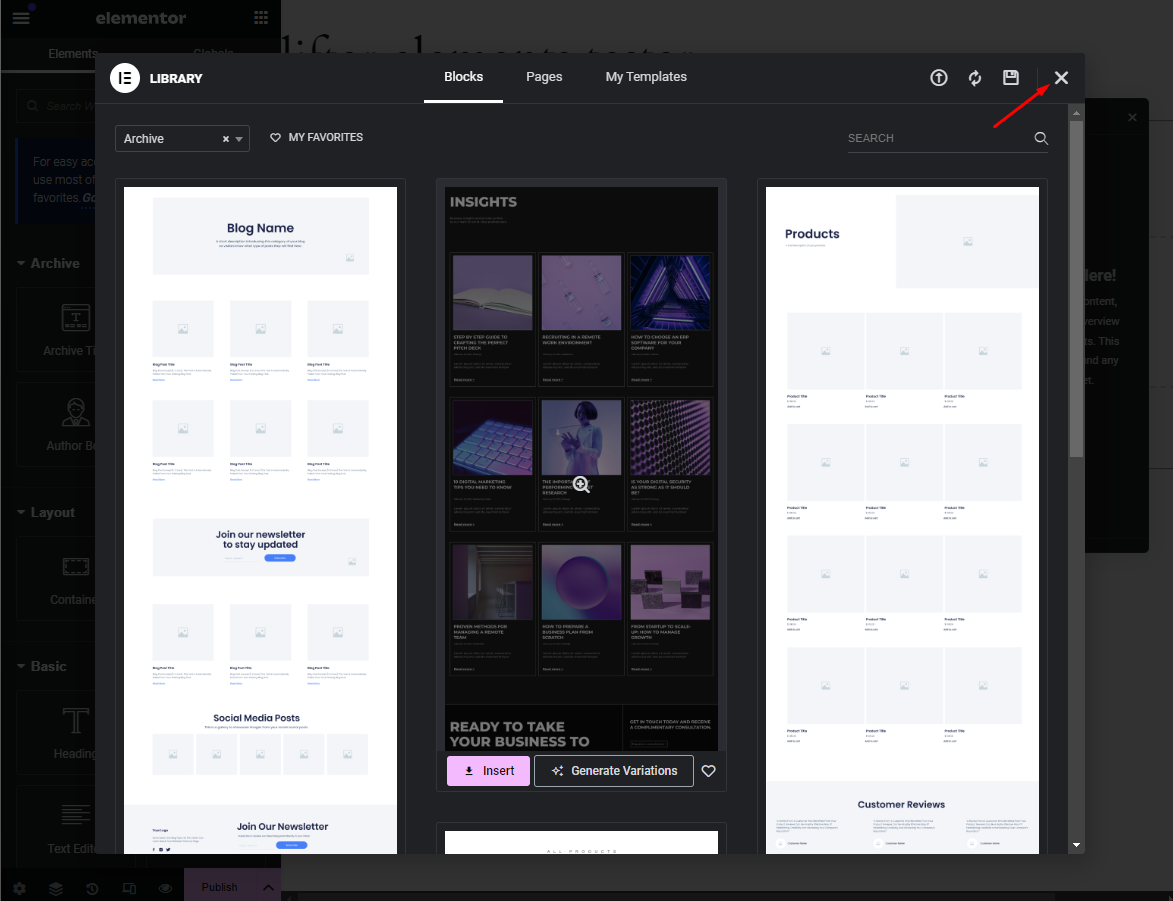
The Elementor editor opens with the Template Library in front of it. Either pick a pre-designed archive block to customize, or close the library to start from a blank canvas.
2. Add the Course List widget
In the widget panel, open the Lifter Elements category and drag the Course List widget into your layout. The editor immediately renders your published courses in a three-column grid.
Add a Heading widget above it if you want a page title; the archive template does not print one on its own.
3. Configure the list
With the Course List widget selected, work through its Content tab:
- Render – leave Lifter Elements selected to control the card layout from Elementor. LifterLMS uses the stock LifterLMS card instead and hides the template-item and styling options below.
- Columns – choose 1 to 6 columns. The control is responsive, so set separate values for desktop, tablet, and mobile. Turn on Equal Heights? to give every card the same height.
- Posts per Page – set how many courses to show;
-1shows all of them. - Order and Order By – for example Ascending Order by Title, or Descending Order by Date for newest first.
- Template Items (in the Custom Template section) – the parts of each course card and the order they appear in. The default set is Video or Featured Image, Title, Progress, and Price. Add, remove, or drag items to change the card; other item types include Excerpt, Link (as text or a button), Taxonomy, and Custom Text.
Course title, featured image, and progress are therefore items inside the Course List card, not separate widgets. Use the Style tab to set card backgrounds, borders, typography, progress-bar colors, and button styling. The full control list is in the Course List reference.
4. Publish with a display condition
Click Publish. In the display conditions dialog, click Add Condition and set it to Include > Archive > Courses Archive, then click Save & Close.
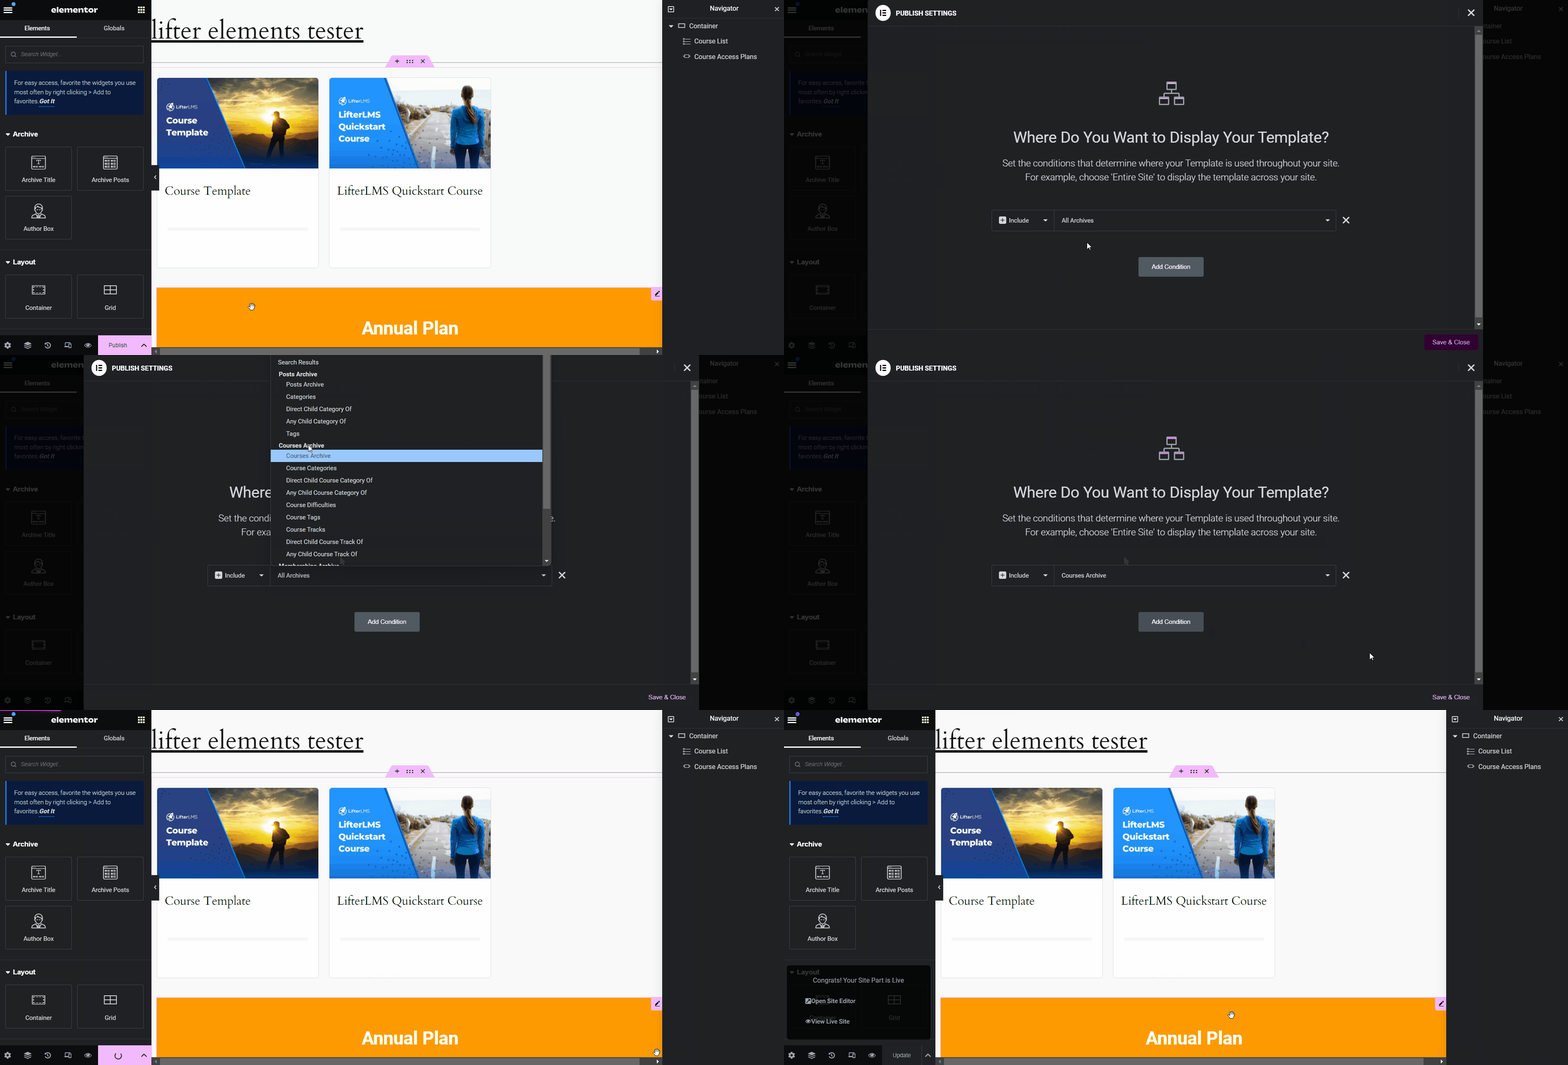
Display conditions are an Elementor Pro feature; see Elementor's display conditions guide for the other options.
Result
Your site's course catalog page (/courses/ by default) now renders your template instead of the stock LifterLMS loop. Open it in a new tab to check: the Course List widget shows every published course using the columns and card items you configured, and the template appears under Templates > Theme Builder > Archive with its condition listed.
To change the catalog later, edit the template rather than the page. For the pages that each course card links to, see How to Build a Course Template and How to Build a Lesson Template.
The Course List widget can also narrow the catalog. In its Content section, pick a Course Category, Course Tag, Course Track, or Course Difficulty to show only matching courses (the filters combine), and use Filters: to show only the logged-in student's enrolled or unenrolled courses.