How to Bulk-Import Members via CSV
Add many team members at once from a CSV file, instead of adding them one at a time.
Before you start:
- This is a Teams feature. It needs Teams for WooCommerce Memberships, and a team to import members into.
- You must be the team's owner or manager (or a site administrator).
- The team needs enough available seats for the members you're importing.
Where to find it
- As a team owner or manager: on your team's management page (My Account > your team), below the Add a Member form.
- As a site administrator: in WP Admin > Teams, edit the team and use the Add Team Member control in the team's MemberSync panel.
Either way, it opens the same Upload Members via CSV window.
Prepare your CSV
Your file needs a header row. The only required column is the email address; the rest are optional:
| Column | Required | Notes |
|---|---|---|
| Yes | The member's email address. | |
| role | No | member, manager, or owner. Defaults to member. |
| first_name | No | Updated on the member's account. |
| last_name | No | Updated on the member's account. |
Use the Download template CSV link in the import window to start from a correctly formatted file. (Administrators can set a custom template under Settings > MemberSync > Settings.)
Import
The import is still being finalized in the current release. You can upload a file and map its columns, but the final processing step (actually adding the members) may not complete yet. The steps below describe the intended workflow.
1. Open the import window. Select Upload Team Members (CSV) (or Add Team Member). The Upload Members via CSV window opens.
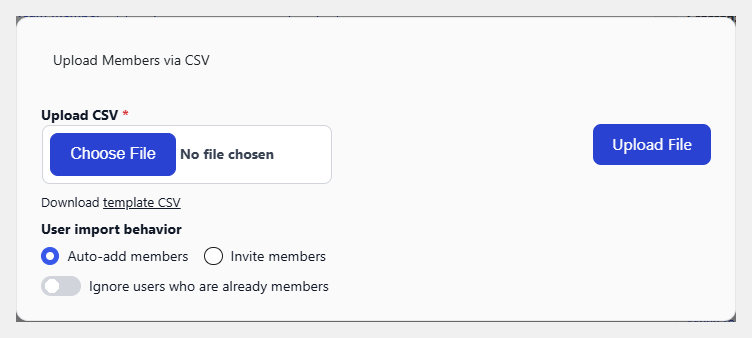
2. Upload your file. Select Choose File and pick your CSV. As an administrator you can also set the User import behavior (Auto-add members or Invite members) and toggle Ignore users who are already members to skip existing ones. Then select Upload File.
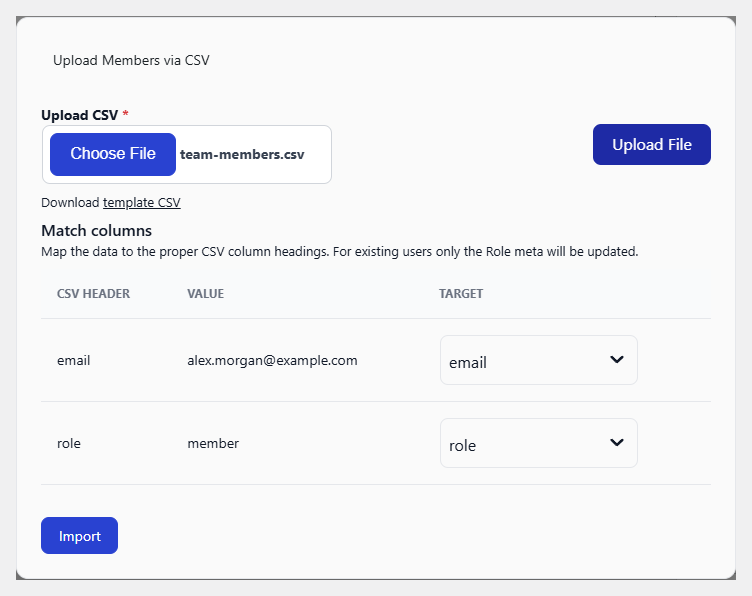
3. Match columns. MemberSync reads your headers and shows each column with a sample value and a Target to map it to. Map at least the email column (required). Columns whose headers already match, like email and role, are mapped for you. Then select Import.
4. Let it finish. A progress bar shows the import running. It processes in batches, so keep the page open until it completes. When it's done, use View Members to see the imported members, or Import Another CSV to run another file.
How members are added
This depends on the import behavior:
- Automatically add: members are added to the team straight away, with a WordPress account created where one doesn't exist.
- Invite: members receive an invitation they must accept before they join.
Set the default under Settings > MemberSync > Settings → Front-end CSV members import behavior; administrators can override it per import. Existing users aren't duplicated. Only their role (and name) is updated.
The importer processes in batches in the browser and doesn't run in the background, so keep the tab open until it completes.