5.4 The Settings Page
Lifter Elements adds one page under Settings > Lifter Elements in your WordPress admin, with three tabs: Documentation, Settings and License. The page opens on the Documentation tab.
Documentation
The Documentation tab is a reference built from whatever the plugin registered when it loaded. It has three areas:
- LifterLMS Widgets — every widget, grouped by category, with its description and, in brackets, any plugin it depends on. Widgets that belong to an add-on only appear while that add-on is active.
- LifterLMS Dynamic Tags — every dynamic tag, grouped the way the Elementor dynamic-tag picker groups them. Each group is collapsed; click its title to expand it.
- LifterLMS Shortcodes — every shortcode tag, grouped by course, lesson and section. Each group is collapsed; click its title to expand it.
The search box at the top filters the widget list. Type one or more words: the search splits on spaces and shows only the widgets whose category, title or description contains every word. course button matches the course buttons and nothing else. While a search is active the dynamic tag and shortcode areas are hidden; clear the box to bring them back.
Because the tab reflects what actually loaded, it doubles as a sanity check. If a widget you expect is missing here, it will also be missing from the Elementor panel, usually because the plugin it needs is not active.
The Basic Usage pages for Widgets, Dynamic Tags and Shortcodes explain how each kind of element is used; the References Hub documents them one by one.
Settings
The Settings tab holds one option group, Dripped Lesson View Allowed. It changes how LifterLMS lesson dripping behaves on pages that Lifter Elements renders.
By default, a student who opens a lesson before its drip date is blocked by LifterLMS and cannot see the lesson content. The two settings below lift that block so the lesson page opens early, for every course or only for courses in the categories you choose. Only the drip restriction is lifted: enrollment, membership and prerequisite restrictions still apply.
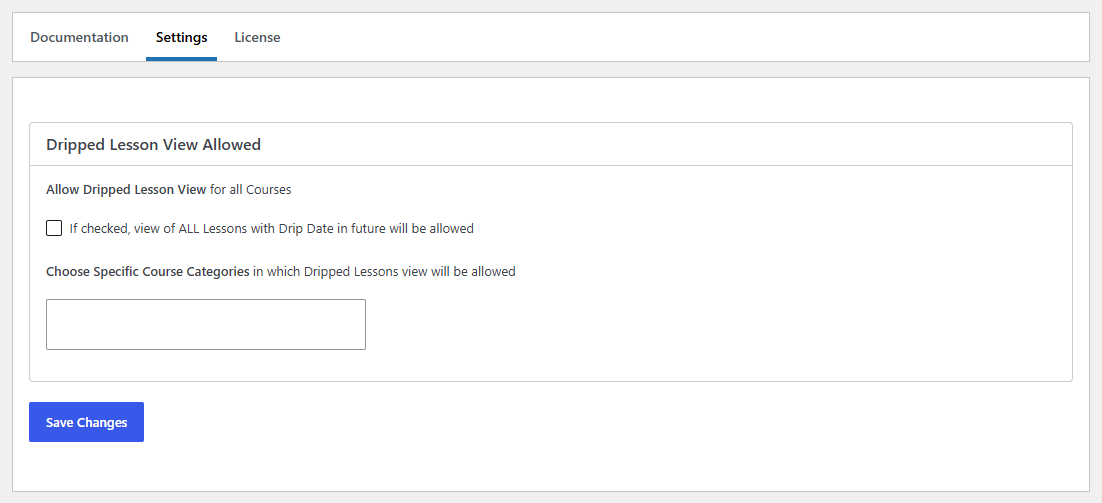
Allow Dripped Lesson View for all Courses
A single checkbox, labelled "If checked, view of ALL Lessons with Drip Date in future will be allowed". Tick it and every lesson on the site can be opened before its drip date, whatever course it belongs to.
Use it when dripping is a pacing suggestion rather than a hard gate, for example when you show the release date on the lesson page with a countdown and still want students to be able to read ahead.
When this checkbox is on, the course-categories select below it collapses and any categories you had chosen are cleared on save. Only one of the two modes is active at a time.
Choose Specific Course Categories in which Dripped Lessons view will be allowed
A multi-select listing every LifterLMS course category. Pick one or more categories and click Save Changes. A dripped lesson can be opened early only if its parent course is in at least one of the chosen categories; lessons in other courses stay locked until their drip date.
Use it when only some of your courses should be readable ahead of schedule (a free tier, an archive, a self-paced track) while the rest keep strict dripping. The select is only available while the checkbox above is off.
How the bypass behaves
- It applies on the live site only. Inside the Elementor editor and its preview the drip restriction is never lifted, so what you see there is the locked state.
- It does not change a lesson's drip date. The drip dynamic tags and the Lesson Drip Time shortcode still read the real release date, so a countdown placed on the lesson template keeps counting down for students even though they can open the lesson.
- Administrators and other users with unrestricted preview access in LifterLMS already bypass dripping regardless of this setting. To let LifterLMS handle it globally instead, see the LifterLMS drip content docs.
License
The License tab is where you enter your Lifter Elements license key and click Activate. An active license enables automatic plugin updates; the tab also offers Deactivate and Deactivate & Clear License once a key is active. See License Activation for the setup steps.
Next step
With the plugin configured, the next page covers where your course, lesson and archive templates are assigned: Theme Builder Locations.