4.5 Creating Lifter Elements Templates
5. Creating Lifter Elementor templates
By default, Elementor Pro doesn't correctly detect the LifterLMS content, so it's missing from the list of available locations in the Theme Builder. This prevents you from creating layouts for lessons and some of the kinds of content added by various LifterLMS add-ons. With Lifter Elements, the LifterLMS post types are accessible as Theme Builder locations so you can change the style and layout of 1000 lessons at a time using a single template.
We offer importable templates to get you started using Lifter Elements. They can be purchased individually, and we include some with the Creator Edition. All templates we offer are included in the Creator's Club all-access membership. Templates are a way to quickly import new layouts you can apply to your courses, lessons and catalog. They can also be a great way to see what you can accomplish using the plugin. It's possible to target different templates to different courses or lessons and have many present on your site at the same time.
i. Creating your first templates
ii. How to Build a Course Archive or Catalog Template
Creating a custom Course Archive or Catalog template allows you to design a unique layout for displaying all your available courses. Lifter Elements integrates seamlessly with Elementor, giving you complete control over how your course archive page's looks and functions.
- Create a New Archive Template
- Navigate to the Theme Builder: In the WordPress dashboard, go to Templates > Theme Builder
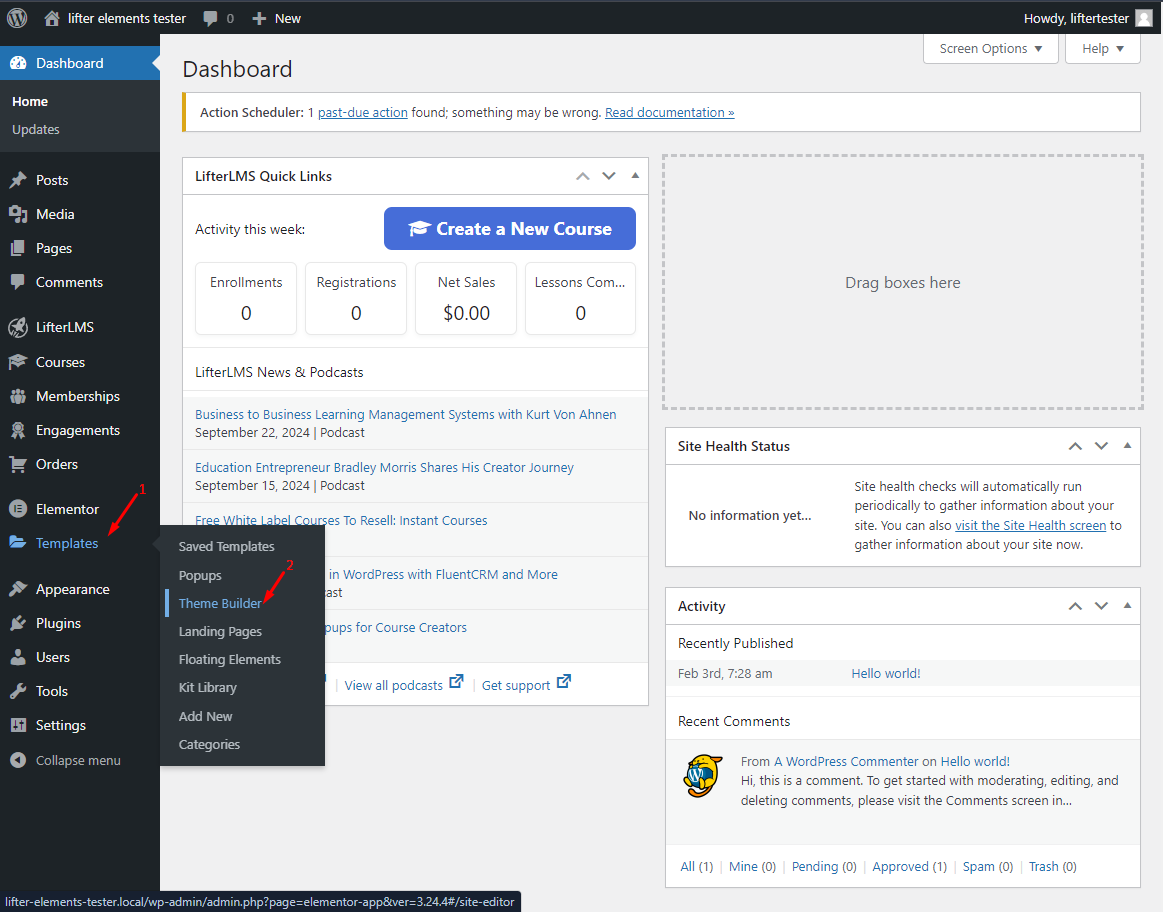
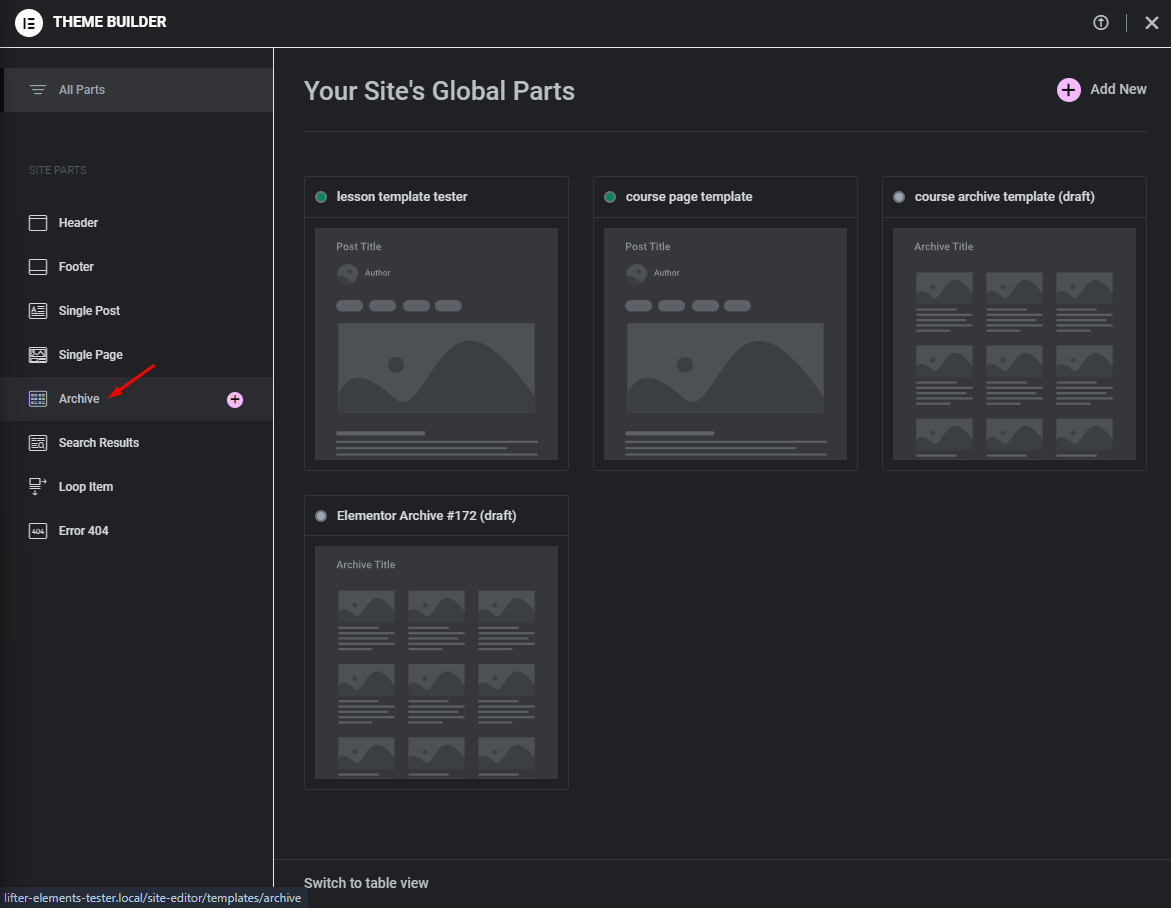
- Select the Archive tab.
- Add a New Archive Template: Click the Add New button at the top of the screen
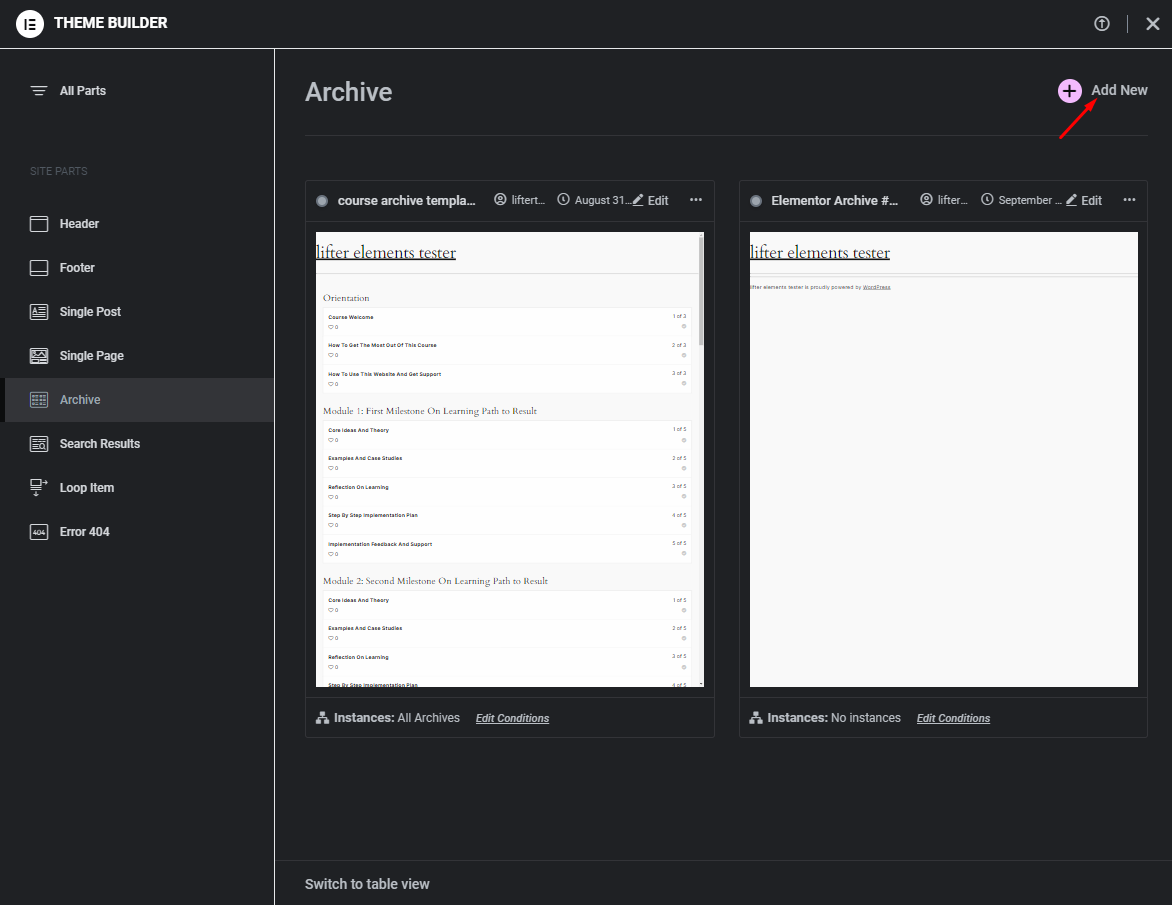
At this point, you can choose to start your new template with pre-built designs or you can start from scratch with a blank template.
- Choose a Pre-Designed Template (Optional): If you prefer to start from a pre-built design, Elementor will present several template options that you can select and then customize. You can view pre-built designs for archive templates if you select Archive from the dropdown menu.
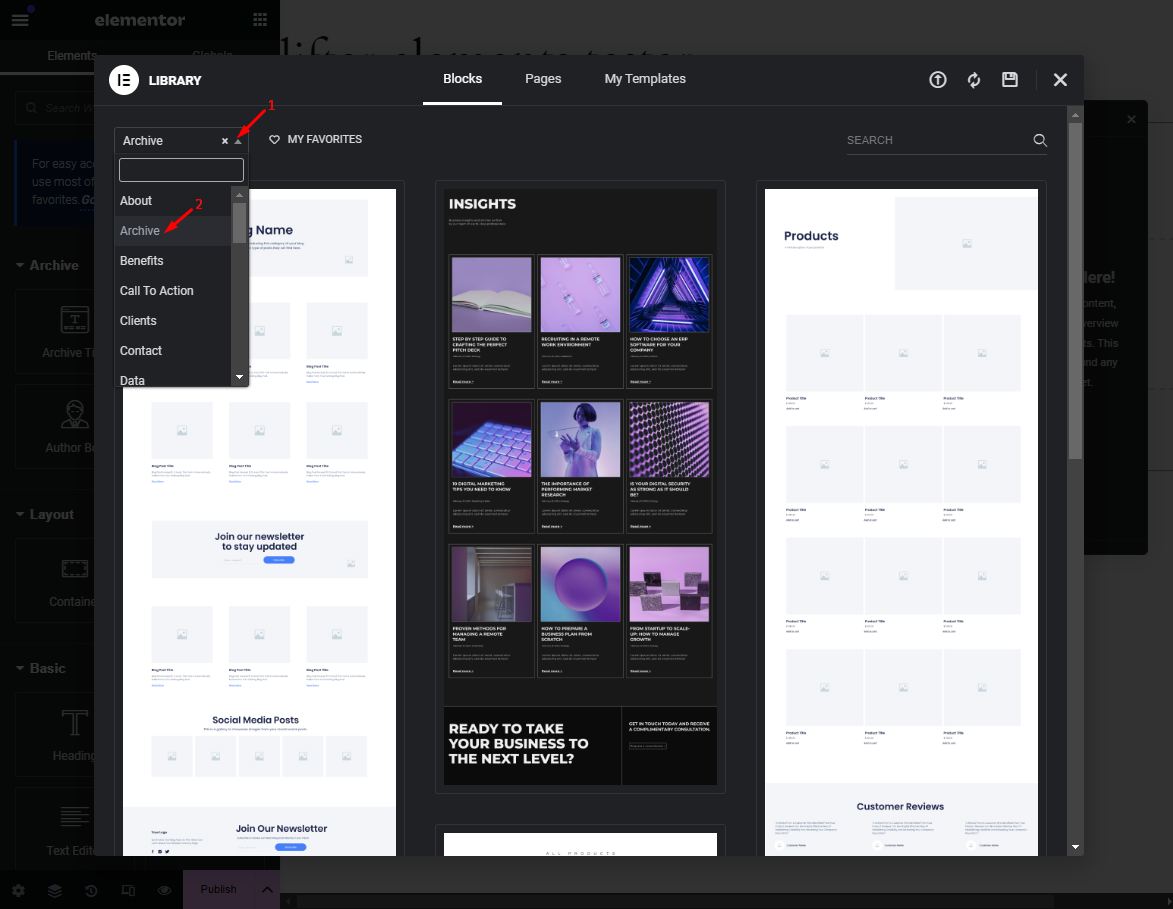
- Start from Scratch (Optional): If you want to start from scratch, just close the Template Library window.
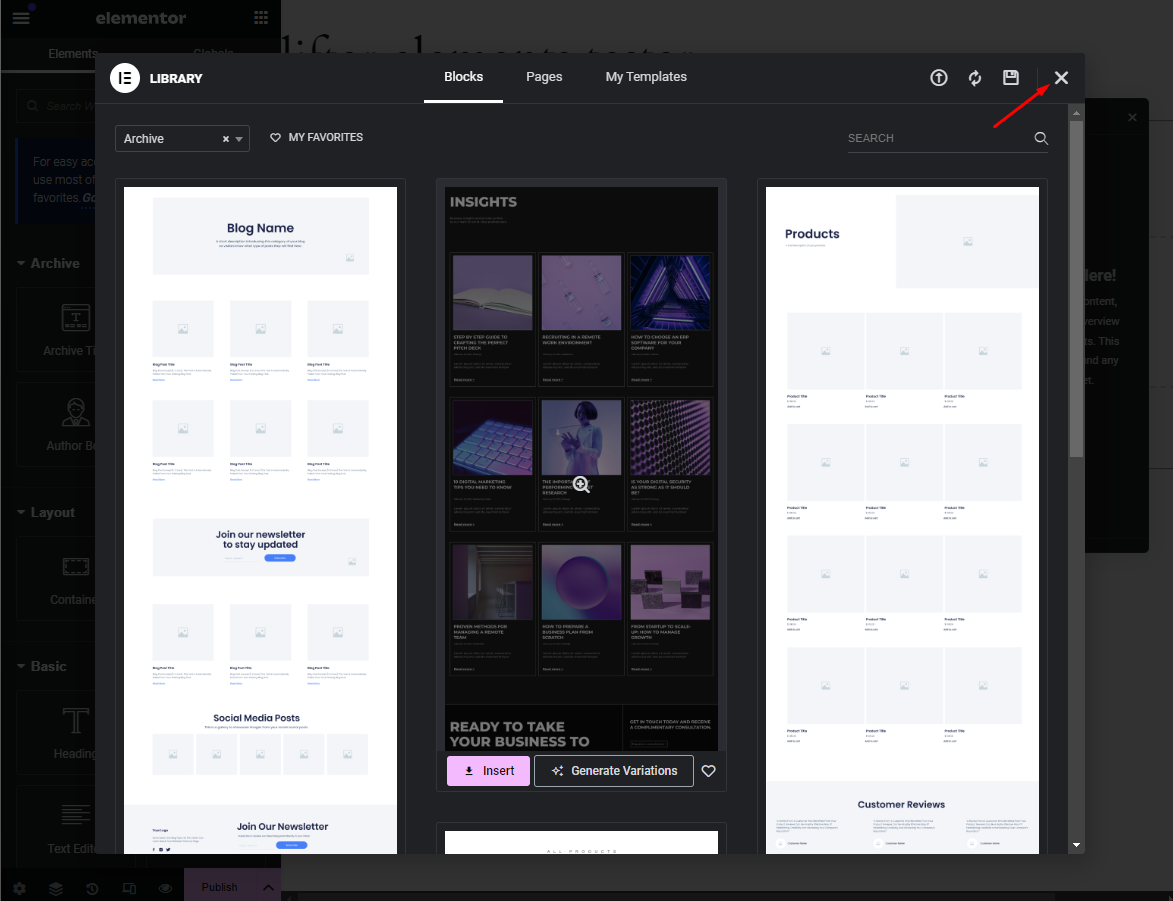
- Design Your Course Archive Template
-
Add a Course Listing Widget: In the Elementor editor, drag and drop the Courses widget from the Widgets panel into your design canvas. This widget will automatically display all available courses in a grid or list format.
-
Customize the Widget: You can adjust the layout, style, and appearance of the courses. This includes changing the number of columns, image sizes, and typography. Additional settings like course filters and pagination can also be configured to help users find the right course quickly.
Widgets that are commonly used to build the Course Archive template:
- Heading
- Course List
-
Include Additional Information: To enrich your course archive, you can add other widgets, such as Course Title, Featured Image, and Course Progress to give students a preview of course content or progress.
-
Dynamic Tags: Use Elementor’s Dynamic Tags to pull course-specific information into your template, such as course price, lesson count, or difficulty level. These tags allow for a highly dynamic and personalized course catalog.
- Assign the Template Once you’re satisfied with your design:
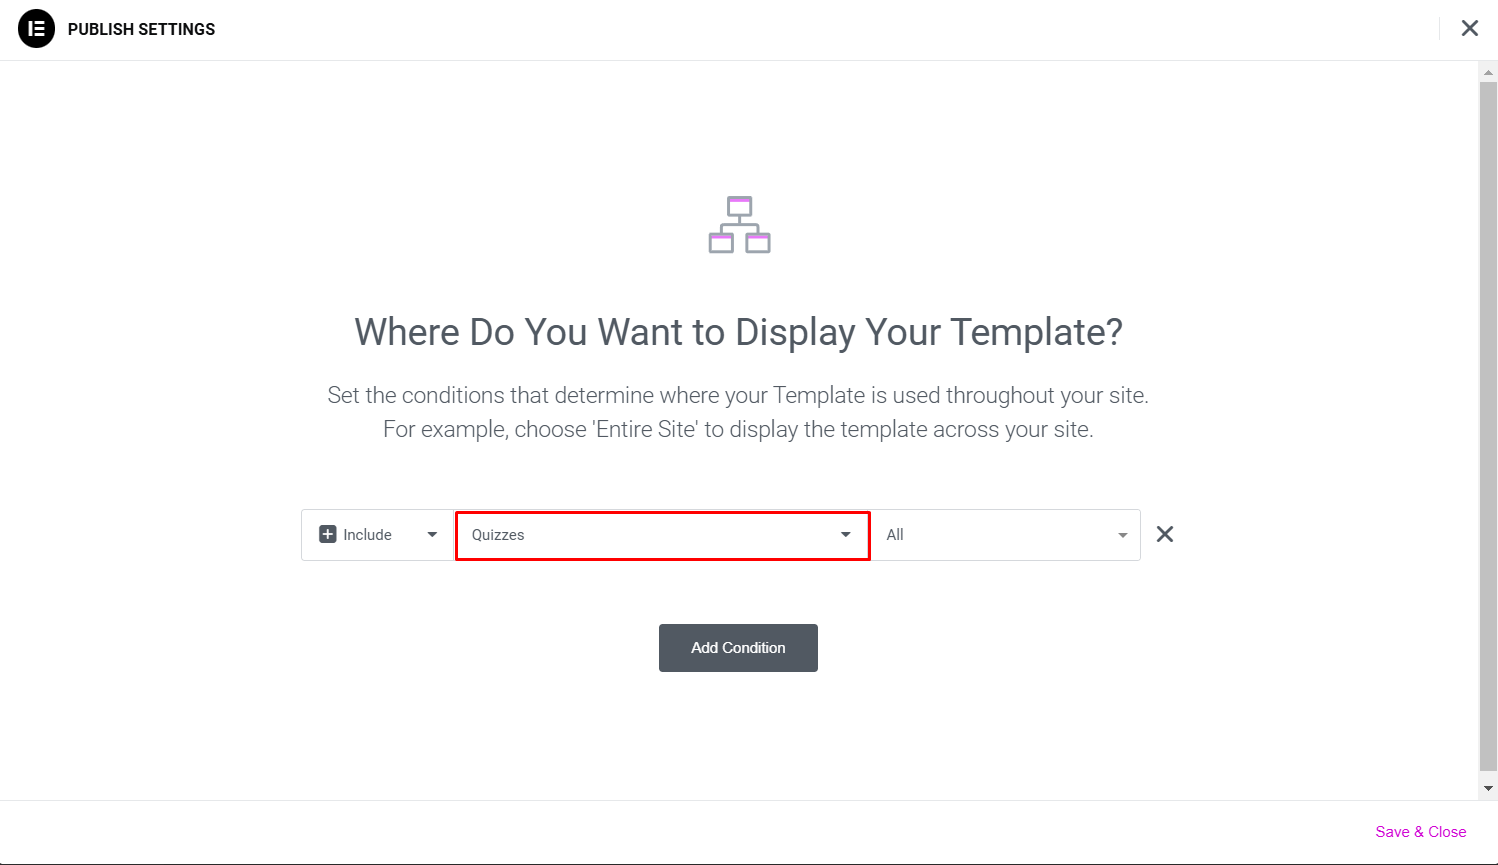
- Click Publish and set display conditions. Select the Courses Archive option under Display Conditions to ensure the template applies to all course archive pages.
After publishing, this template will automatically replace the default course archive layout on your site. More information about setting Display Conditions can be found here.
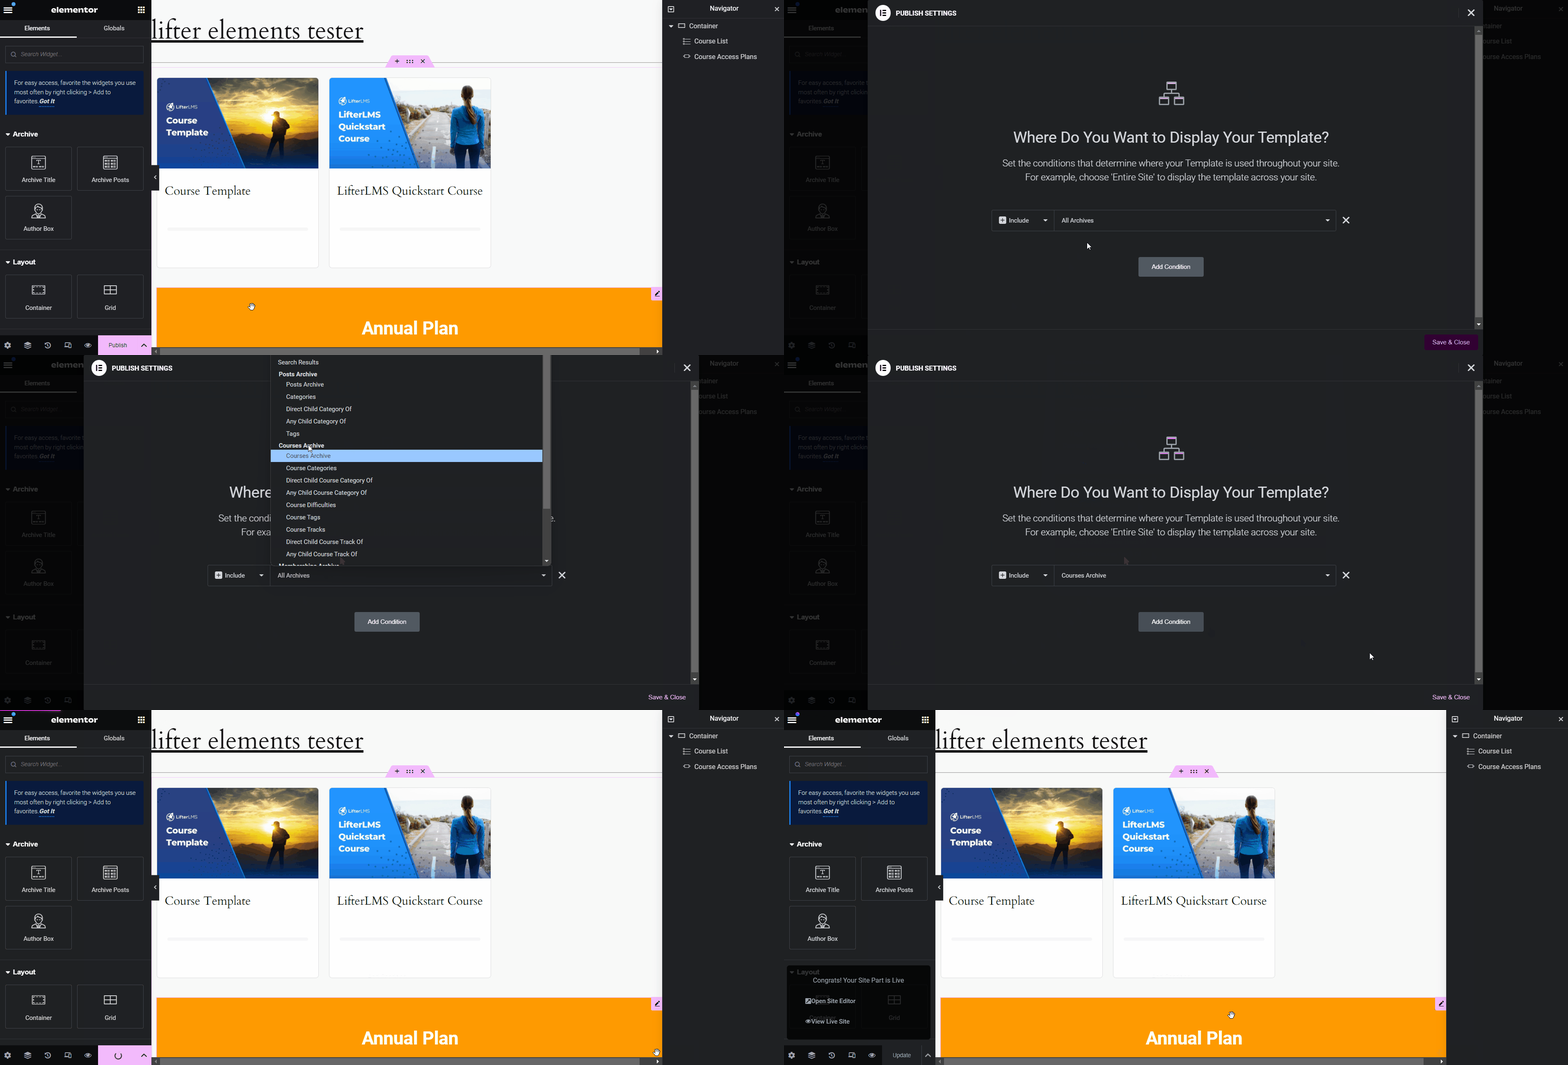
- Preview and Fine-Tune Preview your course archive page to ensure it looks the way you intended. You can make any additional adjustments directly in the Elementor editor. Once you’re happy with the final look, your custom course archive will be live and ready for students to explore.
By following these steps, you’ll be able to create a fully customized and dynamic Course Archive template that enhances user experience and showcases your courses effectively.
iii. How to build a Lesson Template
Here's a Walkthrough of the basics of setting up a Single Lesson template and which widgets are commonly used so you can understand how the structure is set up.
- To get started, make sure you're logged into the WordPress Admin dashboard and navigate to Templates > Theme Builder.
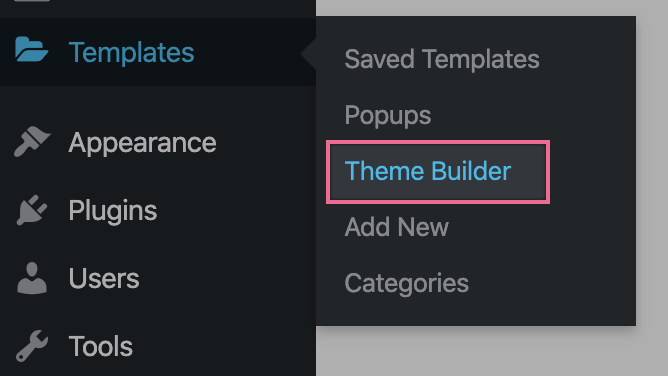
Click Add New next to My Templates at the top of the screen.
- For the Template Type, you will want to choose Single Post.
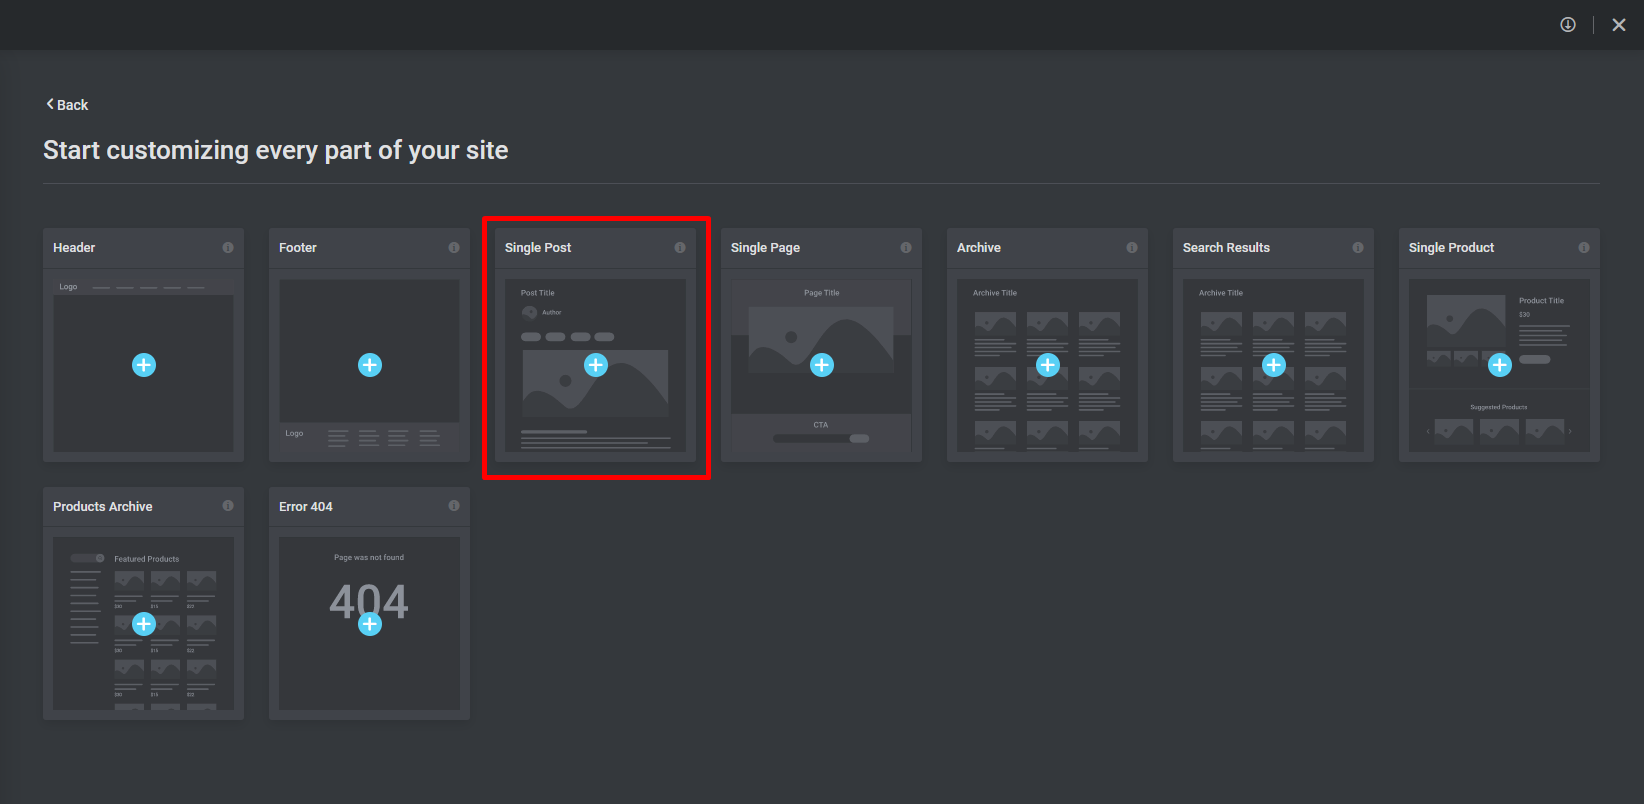
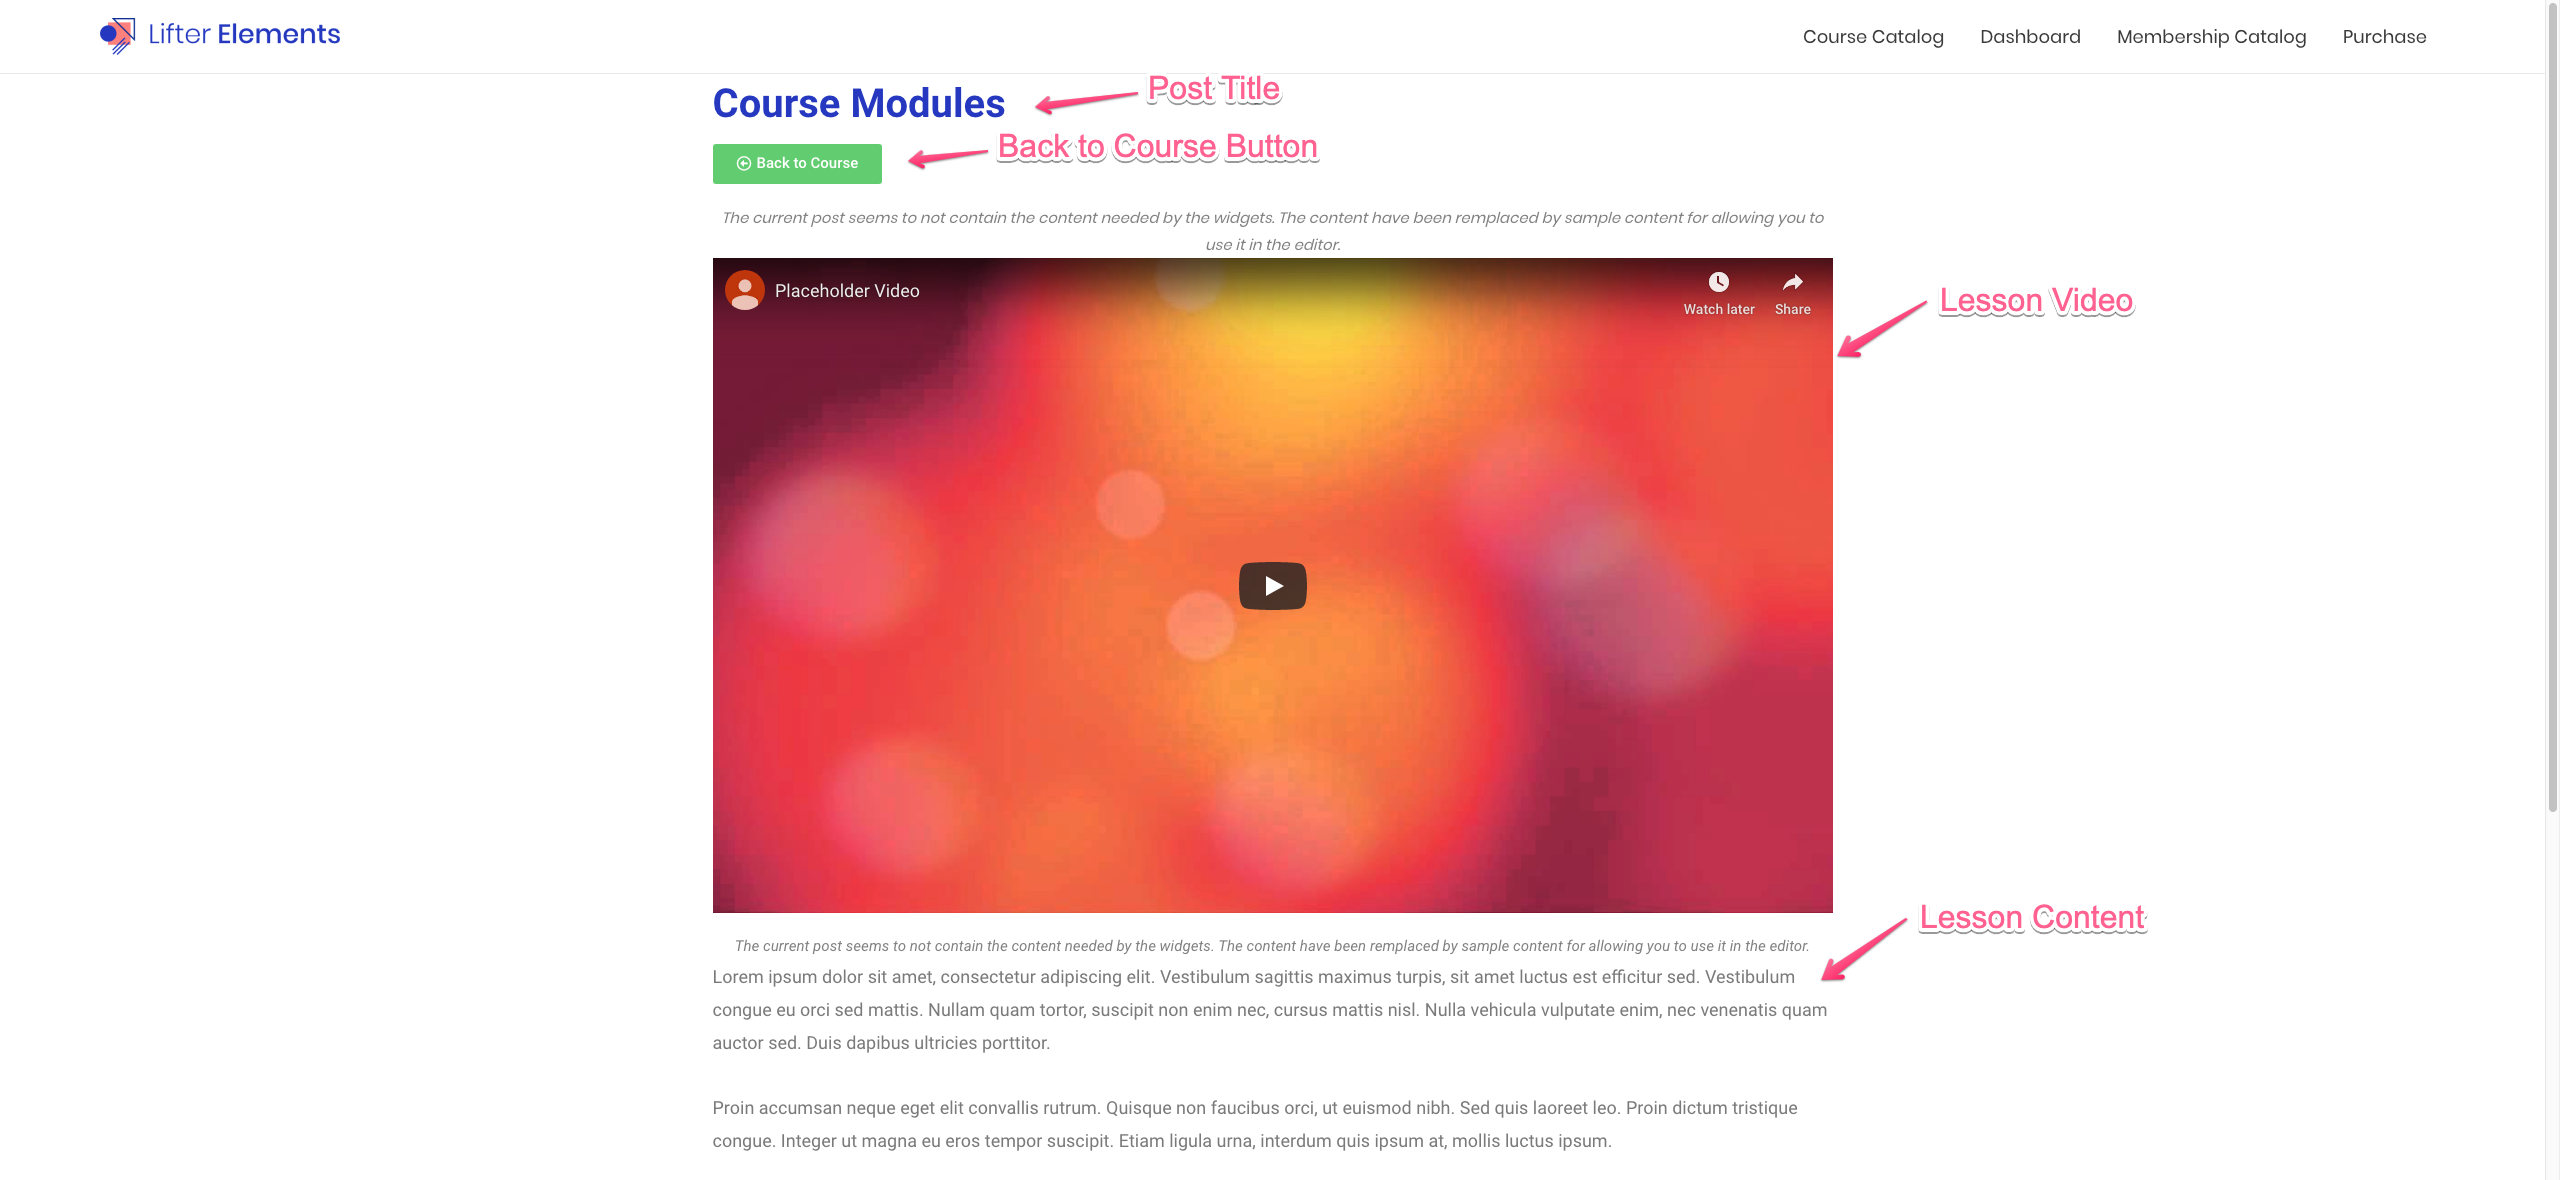
- Here are the widgets that are commonly used to build the template:
- Post Title
- Back to Course Button
- Lesson Video
- Lesson Content
- Course Outline
- Lesson Navigation
- Mark Complete Lesson
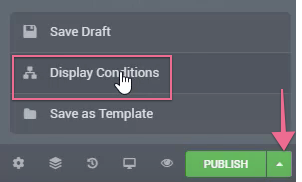
- When the template is complete, we will need to tell the Theme Builder how we want the Lesson template to be displayed. Click on the Green Button in the bottom-left-corner of your screen, then on Display Condition.
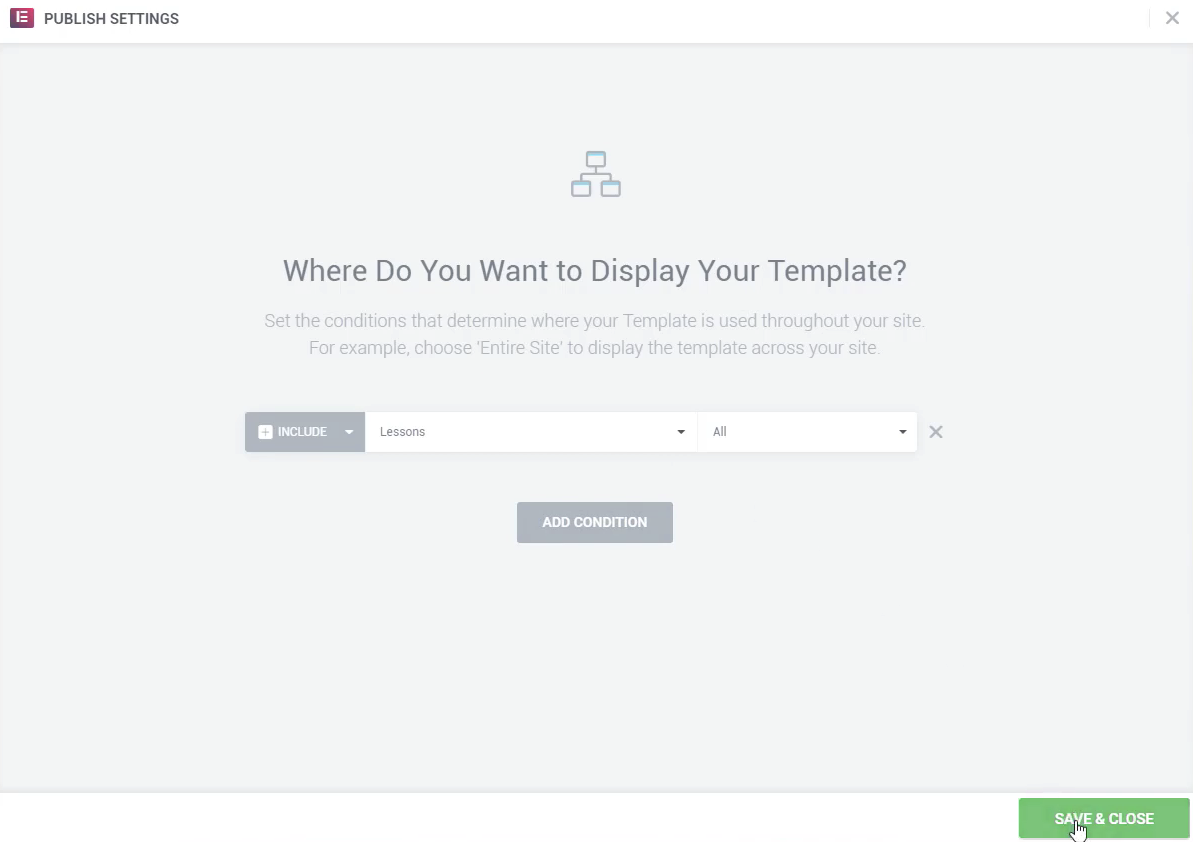
You can include this Lesson template to display however you like, there is a lot of flexibility with the display conditions. For this example we used All.
iv. How to build a Course Template
Here's a walk-through of the basics of setting up a Course Template and which widgets are commonly used so you can understand how the structure is set up.
- To get started, make sure you're logged into the WordPress Admin dashboard and navigate to Templates > Theme Builder.

Click Add New next to My Templates at the top of the screen.
- For the Template Type, you will want to choose Single Post.

- Here are the widgets that are commonly used to build the template:
- Post Title
- Course Author
- Icon Box (using the course length dynamic tag)
- Icon Box (using the course difficulty dynamic tag)
- Course Access Plans
- Course Video
- Course Syllabus
- Course Meta
- Course Continue Button
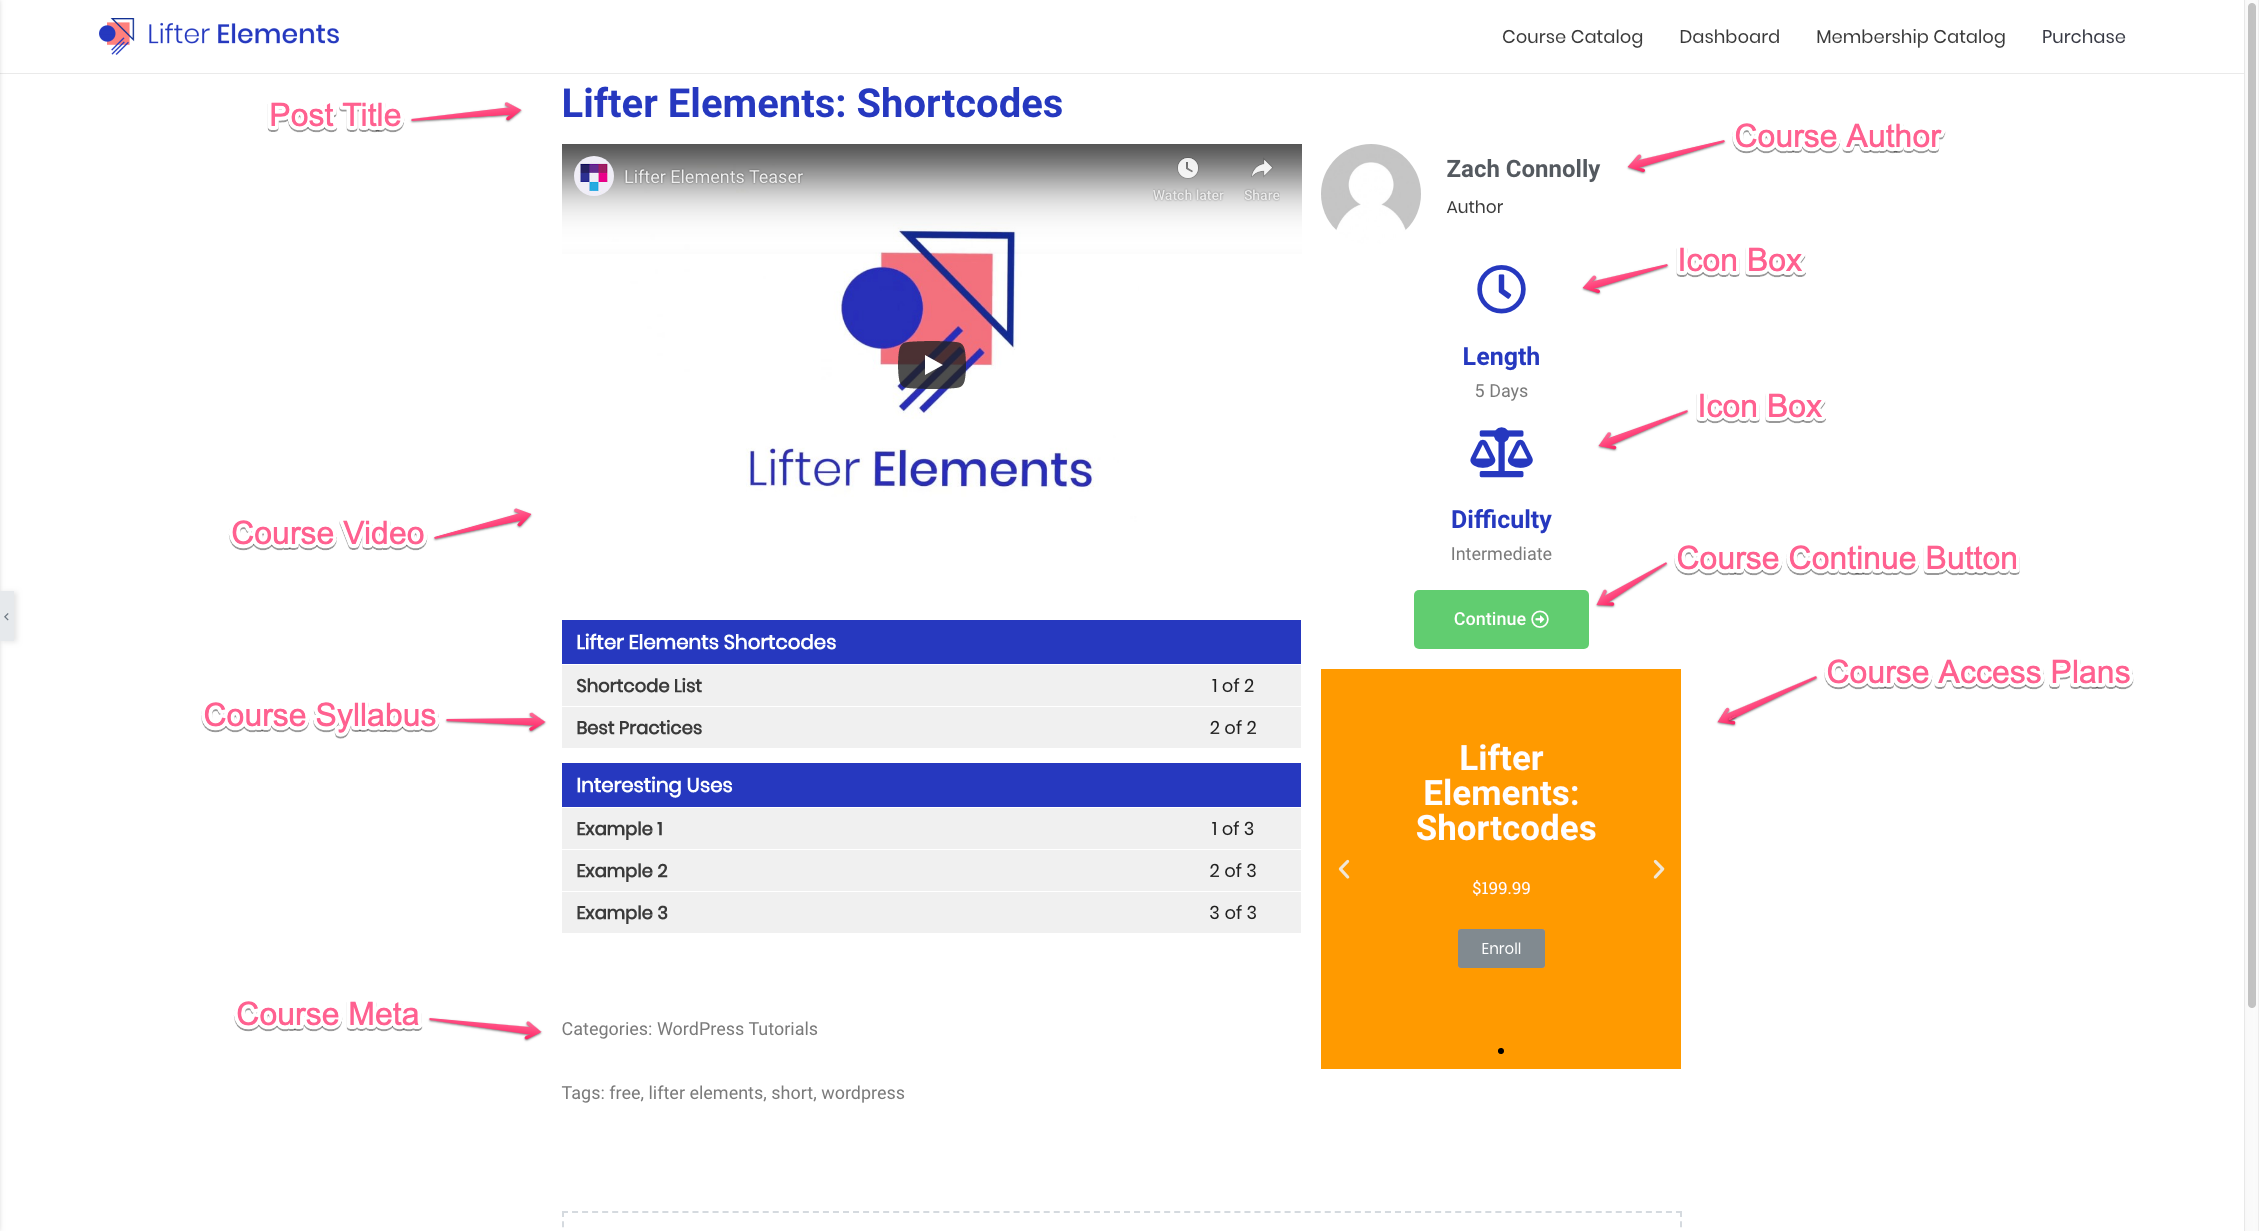
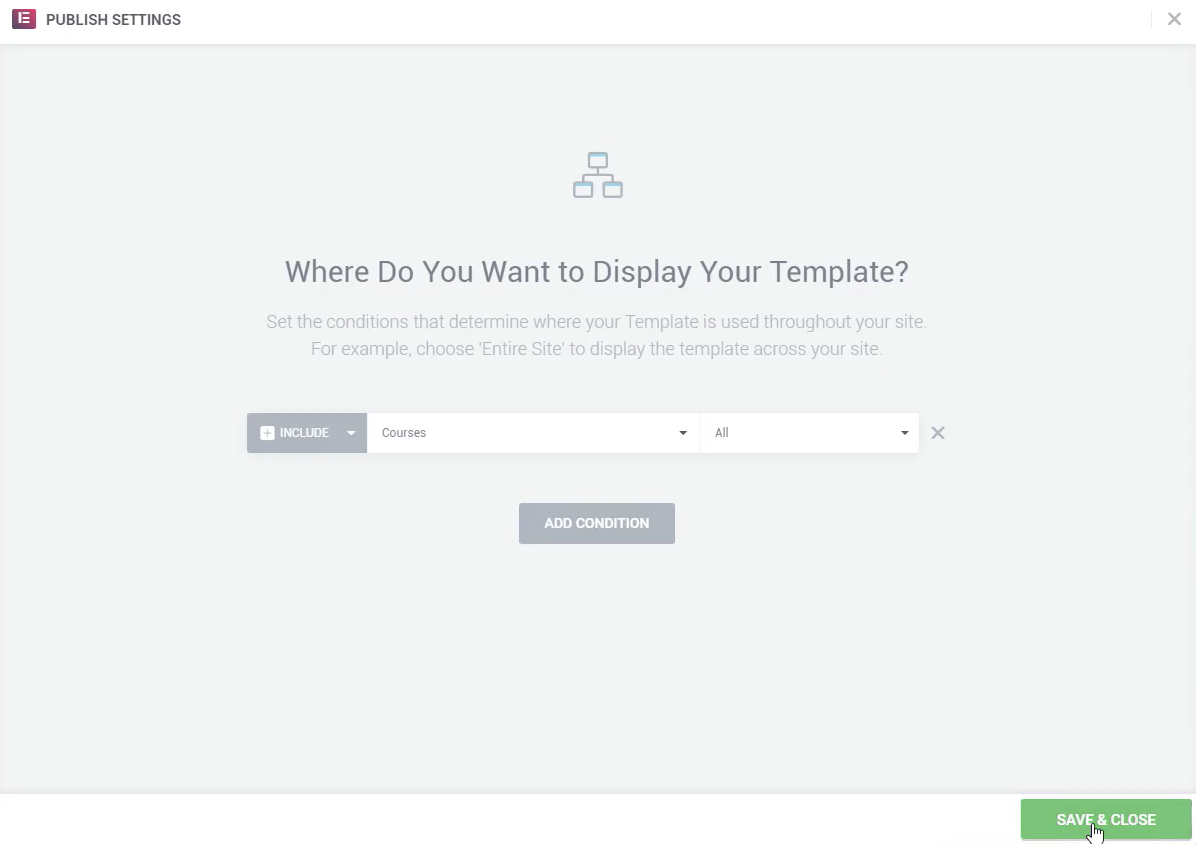
When the template is complete, we will need to tell the Theme Builder how we want the Lesson template to be displayed. Click on the green button in the bottom-left-corner of your screen, then on Display Condition.

You will want to select Courses for the display condition which will show a list of all of the courses that apply when using this template.
v. How to build a Quiz Template�
Here's a Walkthrough of the basics of setting up a Quiz Template and which widgets are commonly used so you can understand how the structure is set up.
- To get started, make sure you're logged into the WordPress Admin dashboard and navigate to Templates > Theme Builder.

Click Add New next to My Templates at the top of the screen.
- For the Template Type, you will want to choose Single Post.

- Here are the widgets that are commonly used to build the template:
- Post Title
- Back to Course Button
- Post Content
- Course Outline
- Lesson Navigation
- Mark Complete Lesson
There isn't any specific Quiz widget, so the Post Content widget is used to display the Quiz content.
- When the template is complete, we will need to tell the Theme Builder how we want the Lesson template to be displayed. Click on the Green Button in the bottom-left-corner of your screen, then on Display Condition.

Display Conditions determine when and where a template appears on your site, offering significant flexibility to fit your design needs. For example, setting the condition to All ensures the template is applied universally across your site, making it a catch-all for all quizzes. Alternatively, you can narrow the focus, such as applying the template only to specific quizzes, categories, or user roles, ensuring it aligns with your intended user experience. Choosing the right conditions helps maintain consistency and functionality, especially in sites with diverse content.
Conditional Logic (included in Creator Edition)
Lifter Elements allows you to dynamically show or hide widgets, sections and columns (now called inner sections) in Elementor. This allows you to shape each student's unique experience with your course platform.
The Conditional Logic System
Conditional logic is available in the Creator Edition of Lifter Elements. Our conditional logic system allows you to hide or show different elements on the page based on certain conditions that you set up. You can set these conditions on widgets, sections and columns (now called inner sections). The panel is accessible from the "Advanced" tab of any widget.
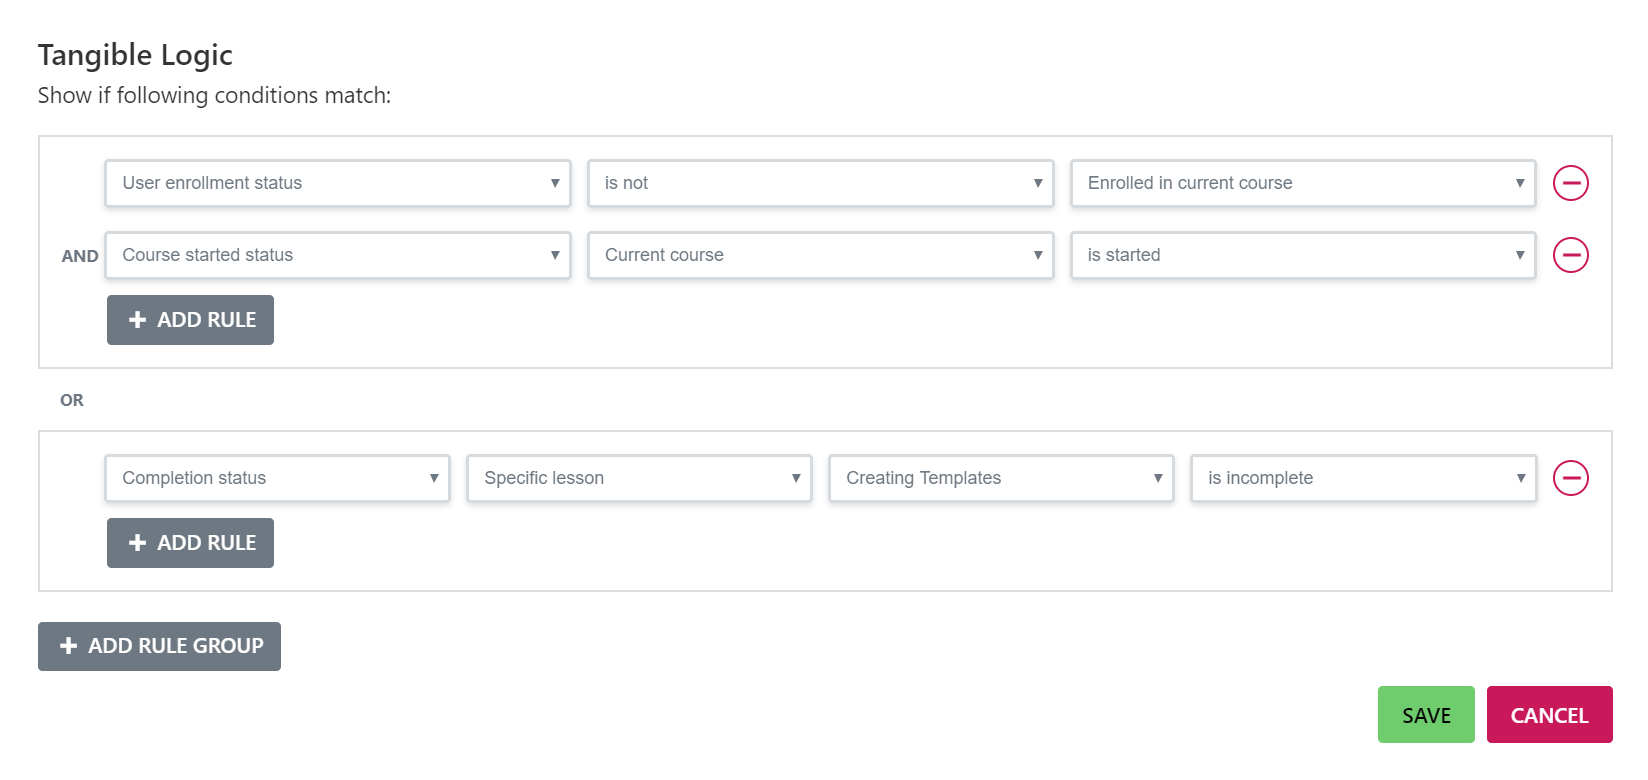
All of our plugins share the same conditional logic panel, so if you install another plugin of ours that adds conditions they will show up in the same panel as the Lifter Elements conditions and can be combined with them.
The panel allows you to create rule groups and add rules to those groups. ALL the conditions in a rule group must be met in order for the widget to be displayed. If you set up multiple rule groups on the same widget, the widget will display if all the conditions in ANY of the rule groups are met.
You can see a list of current conditions available here
Example: Hiding the Course Access Plan widget four users that are already enrolled in the course
- Click on the widget you want to apply the conditional logic to, then on the edit screen, click the Advanced tab.
- You will see a section called Conditional Logic .
- Click on Open Conditional Logic Settings in that section.
- You will then be shown the conditional logic panel which allows you to set the conditions and rules to the specific widget in order to be displayed or hidden.
-
Select User enrollment status for the first rule, then is not for the second column, and Enrolled in current course for the third option.
-
This will set the different pricing for the access plans that will be displayed to the users who are not enrolled in the course already.

- After this is done, make sure you update your page to save changes to the course.
- To test and verify this is working, view a course that a user is currently enrolled in and the Course Access plan shouldn't show up in the sidebar. If you view a course that a user is not enrolled in, the Course Access plan widget will be displayed.
Available Conditions

Completion Status
This status applies to whether a user has completed or not completed a certain lesson or course.
| Available rules | |||
|---|---|---|---|
| Current Lesson | is complete/incomplete | ||
| Current Course | is complete/incomplete | ||
| Specific Course | [Course Name] | is complete/incomplete | |
| Specific Lesson | [Lesson Name] | is complete/incomplete |
Course Started Status
This status applies whether a user has started or not started a course.
| Available rules | |||
|---|---|---|---|
| Current Course | is started/not started | ||
| Specific Course | [Course Name] | is started/not started |
User Enrollment Status
This status applied whether a user is or is not enrolled in the current course.
|Available rules|| |:---|:----:|:---:| ||is|Enrolled in current course| ||is not |Enrolled in current course|
Importing & Installing Templates
Where can I get some templates?
We offer several different ways to download and install one of our plugins for Lifter Elements.
- We sell each template directly on the website if you'd like to buy them individually.
- We include some templates in the Creator Edition of Lifter Elements that you are able to download from your account.
- We also have a membership called Creator's Club Creator's Club which gives you access to all of our plugins and templates with a single license.
Installing a Lifter Elements Template
You cannot upload these templates through the WordPress importer. You must use the Elementor import utility.
If you haven't watched our videos on What is Lifter Elements or learn the course structure and lesson structure, we recommend doing that first to get a solid foundation before importing.
Lifter Elements lets you import pre-made templates through Elementor's theme builder to change the look of your LifterLMS content in just a few minutes. Whether you've purchased one of our templates directly, or received them through the Creator Edition or Creator's Club, the steps to install them are the same:
- First, you'll want to download a template for Lifter Elements from your Tangible Account. Login, browse to Downloads and click Download Now.
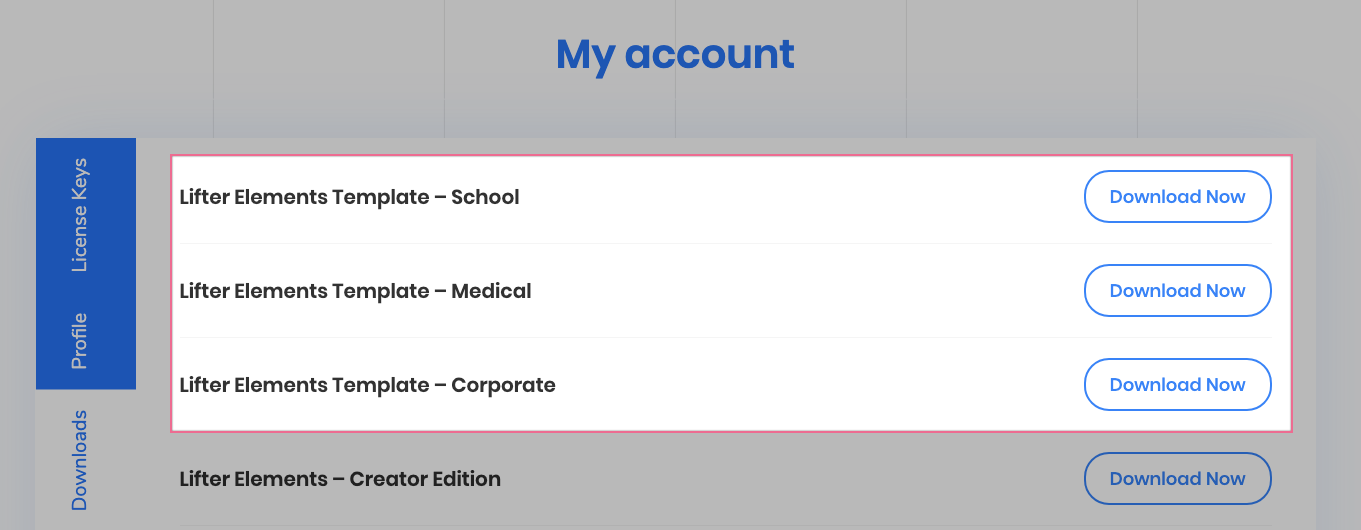
- Unzip the theme archive. Next, you'll want to login to your WordPress Admin and navigate to Templates > Theme Builder > Import Templates at the top of the page.
Click on the button labeled Upload Plugin, then Choose file. Browse your computer for the template file and click Import Now, you will see the template files listed after they are successfully imported.


-
The next step is to set up the Display Conditions for each template. If you haven't done this, you can learn by watching the How to create your first template video.
-
Once the display conditions are set up, you can check to make sure things are working by viewing your courses page.
What to do with the CSS file?
Our styling is included in each template under Settings > Advanced, however, we recommend that you remove it from there and move it to either Customizer > Custom CSS or to your child theme's stylesheet to avoid redundant styling and in order to be able to make global changes.
View a template demo
We have demo sites set up if you'd like to look at the template before you use it to understand what it might look like.
