04. Getting Started with BeaverDash
Setting up BeaverDash is a simple process that requires the installation of both LearnDash and Beaver Builder. Once these core tools are in place, you can install BeaverDash to begin building and customizing your LMS site with ease.
Before installing BeaverDash, make sure you have the following plugins installed and activated:
- LearnDash: The core LMS plugin that powers your course and membership functionality. You can purchase and download it from the LearnDash website.
- Beaver Builder: The page builder required for BeaverDash.
Installing BeaverDash
Once LearnDash and Beaver Builder are active, you can install BeaverDash:
1. Download BeaverDash
- Log in to your Tangible account and download the BeaverDash plugin from your dashboard’s “Downloads” tab.
2. Install the Plugin
- Navigate to your WordPress dashboard and go to Plugins > Add New.
- Click Upload Plugin at the top of the page.
- Choose the BeaverDash .zip file you downloaded and click Install Now.
3. Activate the Plugin
- After installation is complete, click Activate to enable BeaverDash on your site.
- You should now see BeaverDash modules available in the Beaver Builder modules panel when editing pages.
BeaverDash works seamlessly out of the box with no further configuration needed. However, you can adjust any specific settings within each widget, such as changing the layout or styling, depending on the content and design of your LMS.
If you encounter any problems during the installation process:
- Ensure that Beaver Builder and LearnDash are both installed and activated.
- Verify that you’re using the latest versions of all related plugins.
- Check for any potential plugin conflicts by deactivating other plugins and testing the installation process again.
4. License Activation
After you've finished installing BeaverDash you will want to add your license key to activate the plugin.
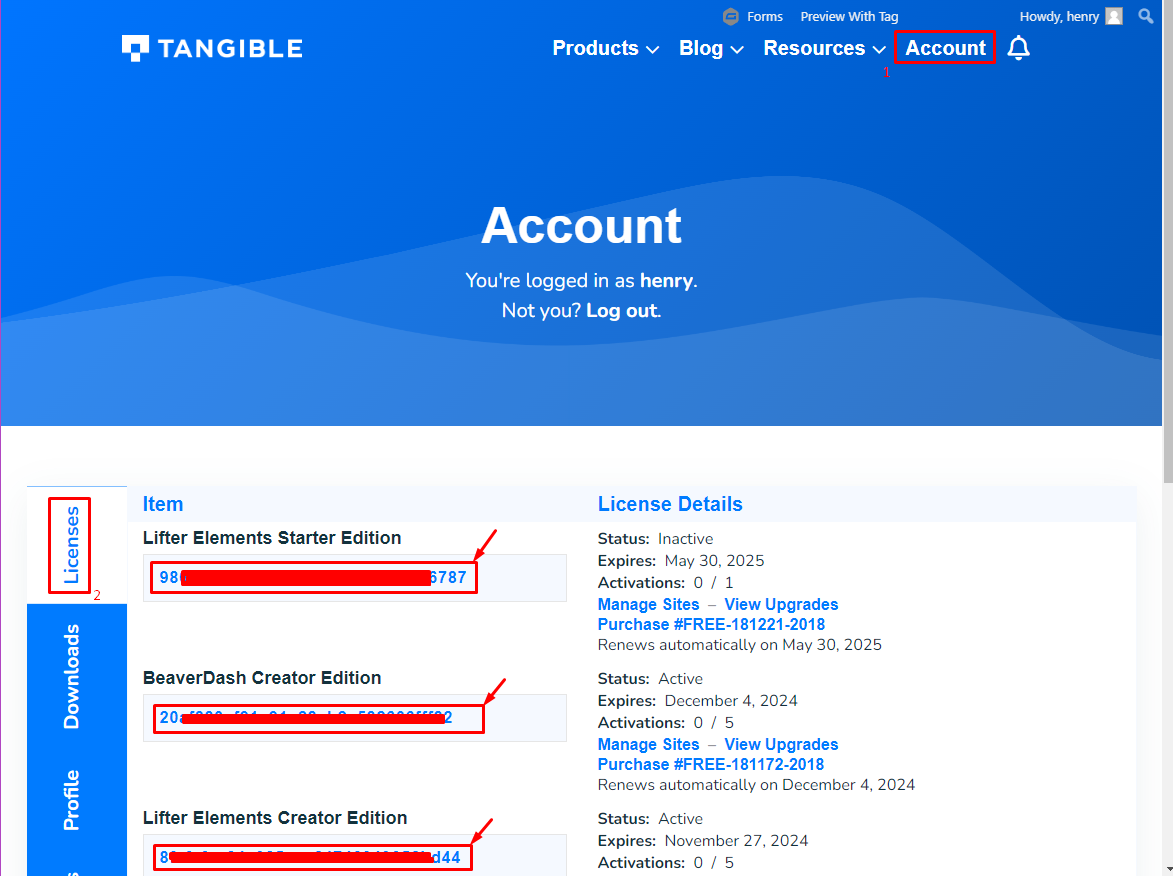
- Login to your Tangible account and go to the Licenses tab.

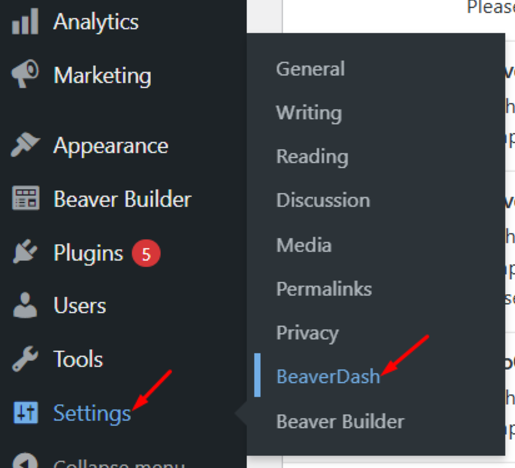
- Copy your license key and go to the Settings > BeaverDash in your WordPress dashboard.

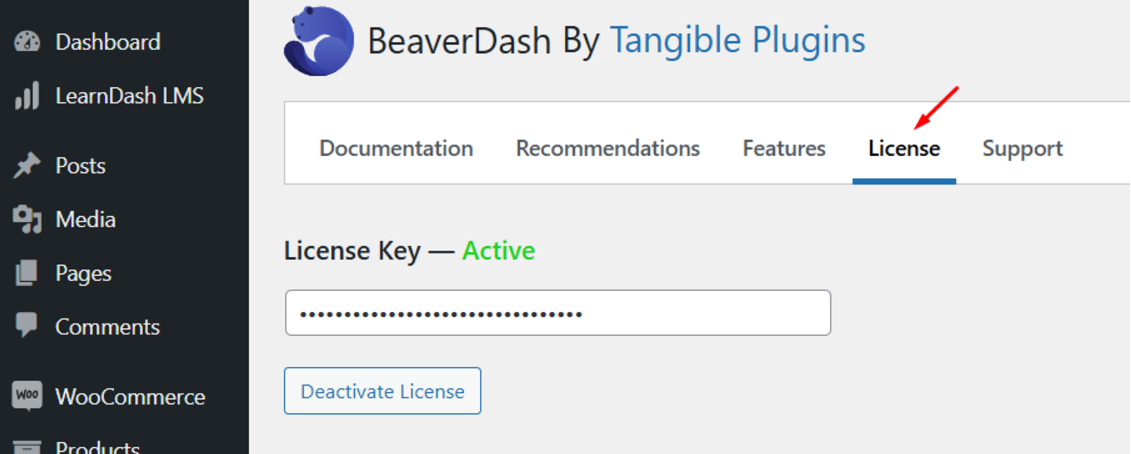
- Click on the License tab, paste your license key, and click on the Save License Key button. After you activate it successfully you will see Active status turn green.

There are several licenses available for BeaverDash.
- Starter Edition - Supports 1 activations, shortcodes, field connections, and modules.
- Creator Edition - Supports up to 5 activations, all Starter Edition features, and visibility conditional logic features.
- Creator's Club - Our all-access pass membership that provides unlimited activations for all our plugins and access to all of our templates
- Multisite Edition - Supports everything that the Creator Edition does plus supports network activation for WordPress multisite.